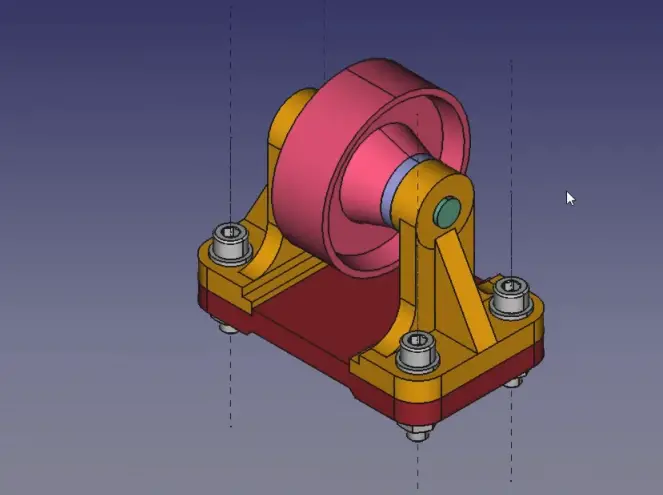
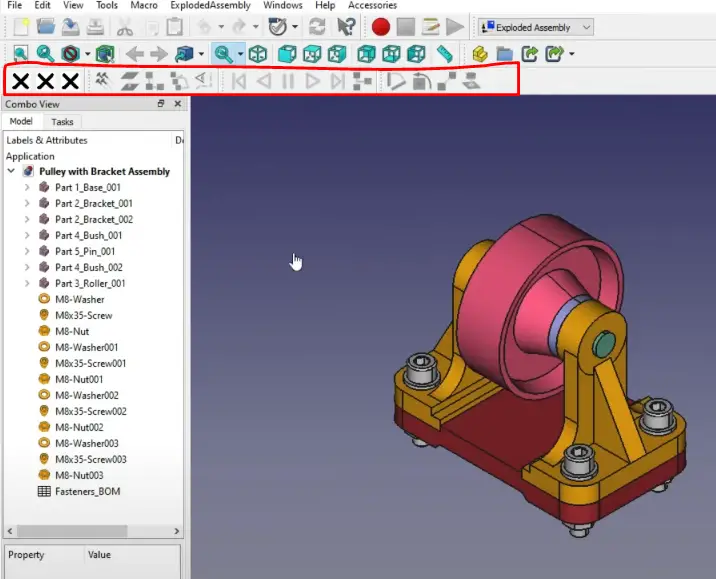
Hello friends welcome to FreeCAD tutorial and in this tutorial we will learn how to create exploded assembly in a FreeCAD with animations we will start from the scratch so here I have opened my assembly As shown in below image.
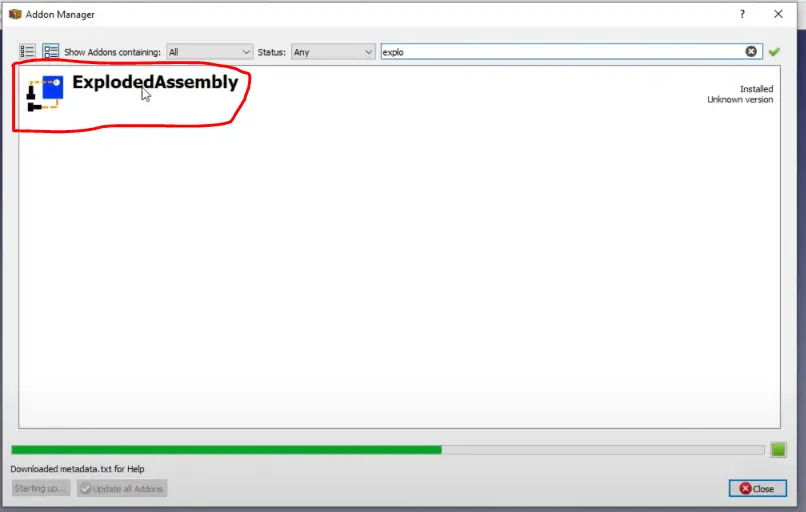
First we will install the exploded assembly workbench from the add-on manager for this go to the tools then add-on manager and type here exploded so you will see here exploded assembly Workbench install it.
Now after install of Exploder assembly workbench you will see tools of exploded Assembly.
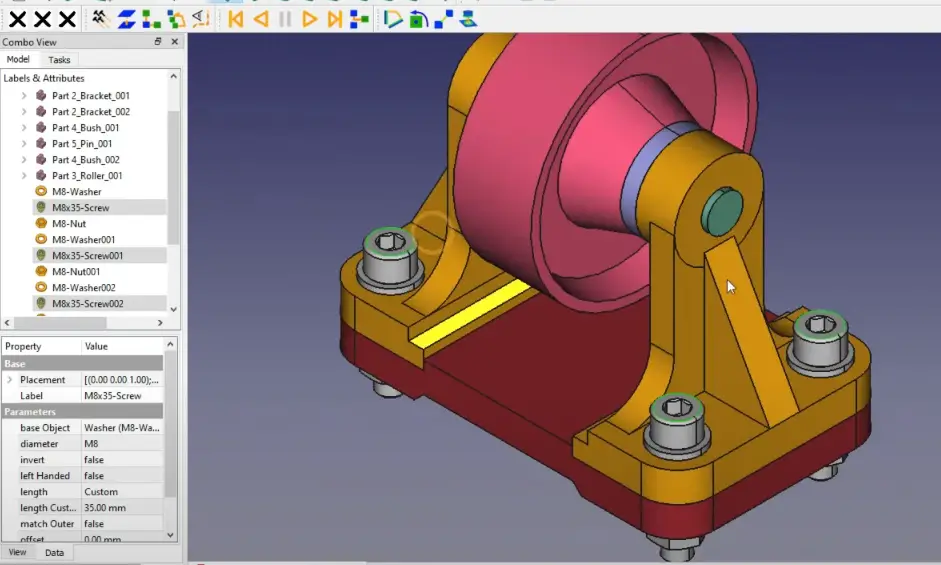
First I will select the all edges of screw as shown in below image.
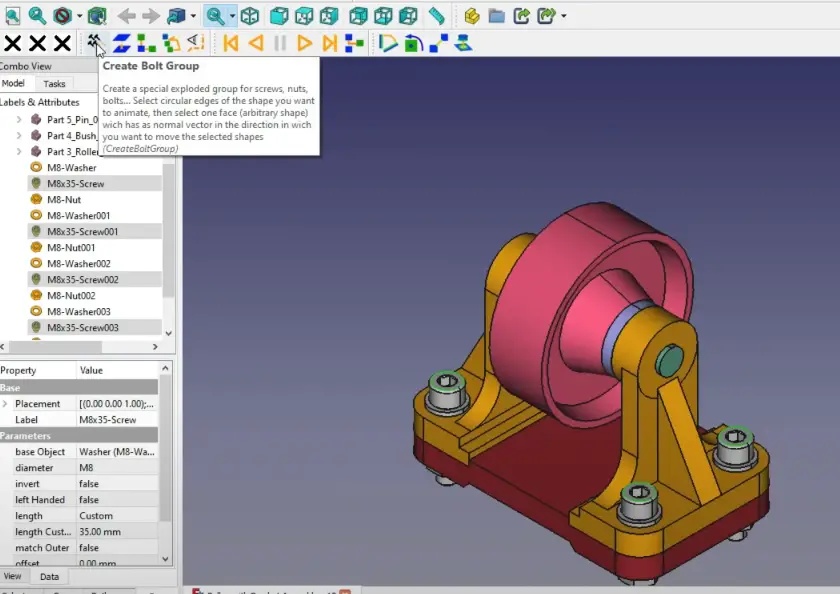
Now click on Create Bolt Group icon as shown in the below image.
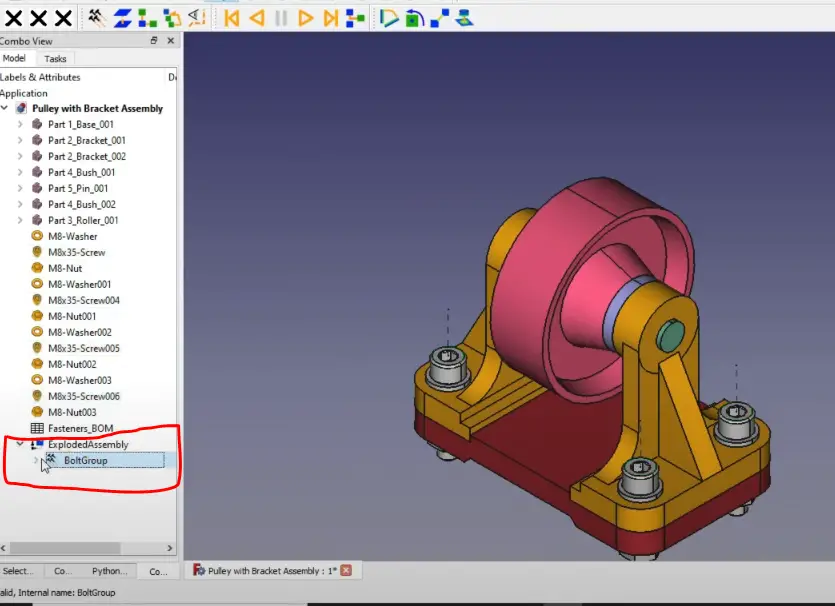
Now in Tree you can see bolt group is created. as shown in the below image.
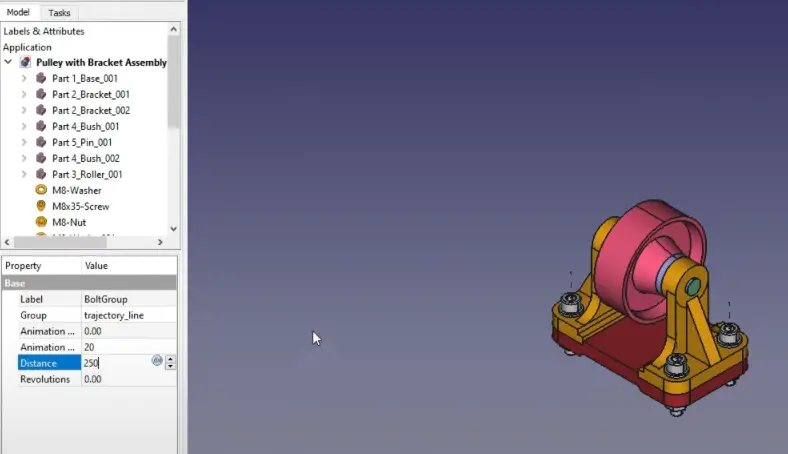
Now click on the Bolt Group and in property section give it distance of 250mm as shown in below image.
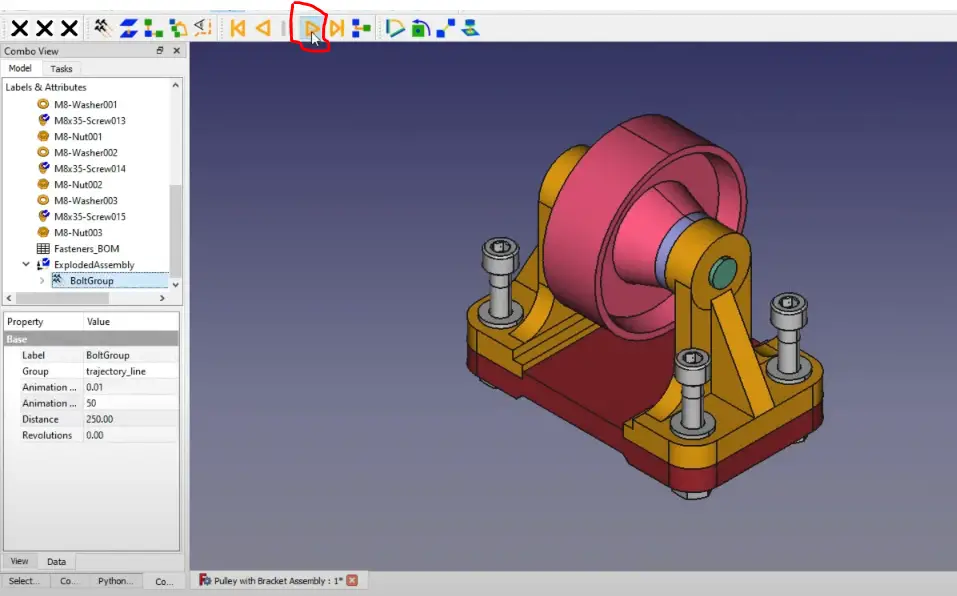
Now click on the play icon to play it. as shown in the below image.
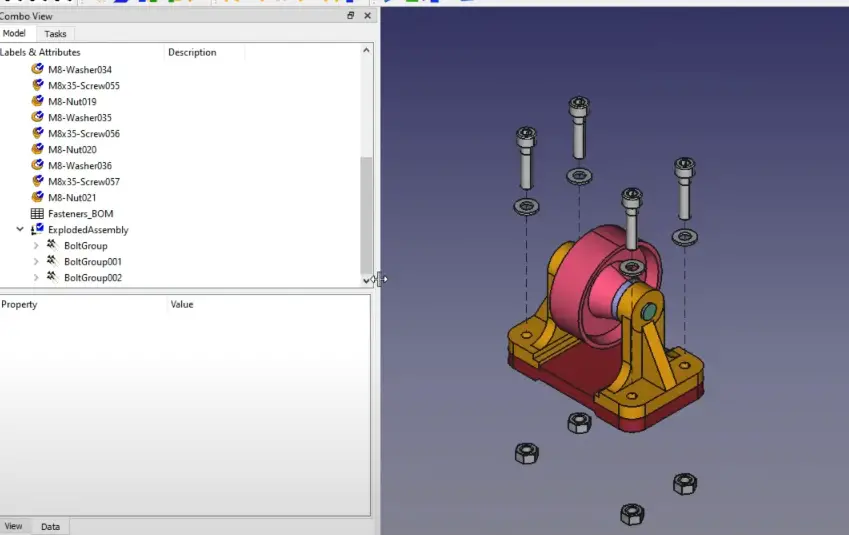
Now create the group for Not and washer as well. Please note give negative value to nut and animate it as we did for bolt. You animated assembly will look like as follow.
If you enjoyed reading this article then please share it on Social media and also give your valuable suggestion in the comment section of this post, your valuable suggestion will help me to improve quality of content in this website.
“Thank you for reading! If you found this article insightful and valuable, consider sharing it with your friends and followers on social media. Your share can help others discover this content too. Let’s spread knowledge together. Your support is greatly appreciated!”

