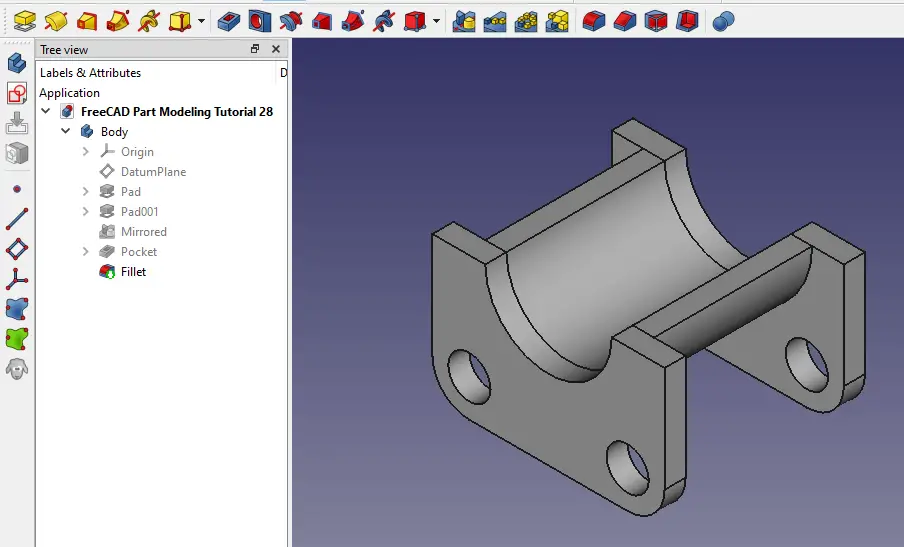
Hello friends welcome to FreeCAD Part Modeling Tutorial 28. In this Tutorial I have explained How to Model above part in FreeCAD. This Tutorial is designed for beginner user to understand part design Workbench in FreeCAD and basic modeling approach in FreeCAD with the help of Part Design workbench.

Also Read-:
| Let’s Understand the Scenegraph in FreeCAD |
| Introduction to FreeCAD: A Beginner’s Guide |
| Exploring FreeCAD Macros and Python Scripting |
Step by Step Guide to Convert below drawing into 3D Model -:

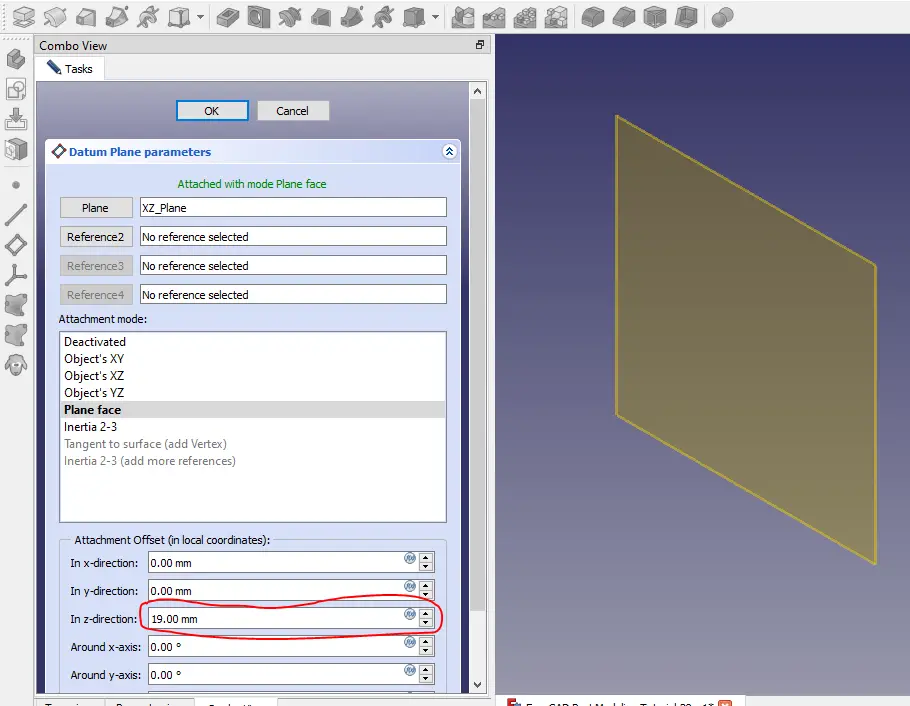
STEP 01-: Create the datum plane at distance of 19mm
STEP 02-: Now create below profile with dimension shown.

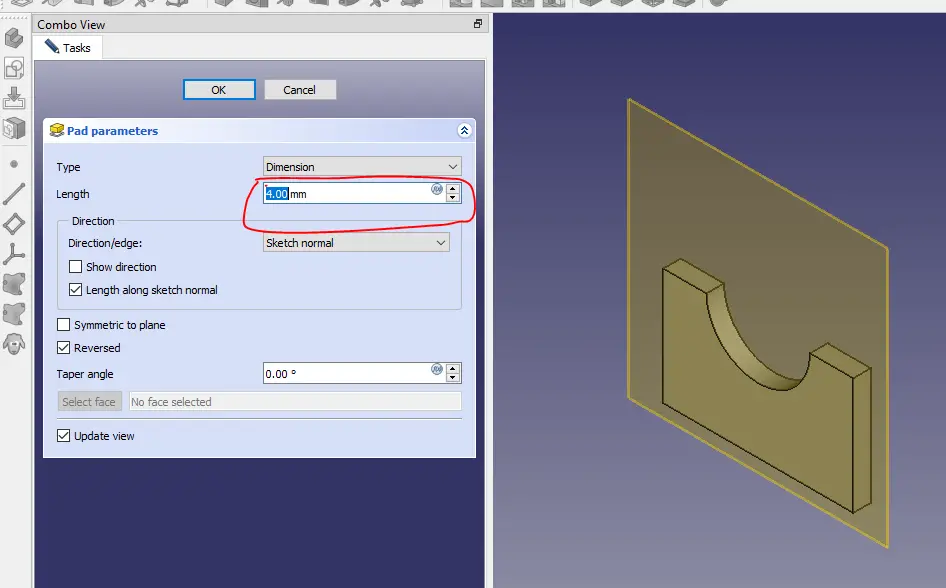
STEP 03-: Now extrude it to 4mm as shown in below image. If you not see the body then click on Reversed option.
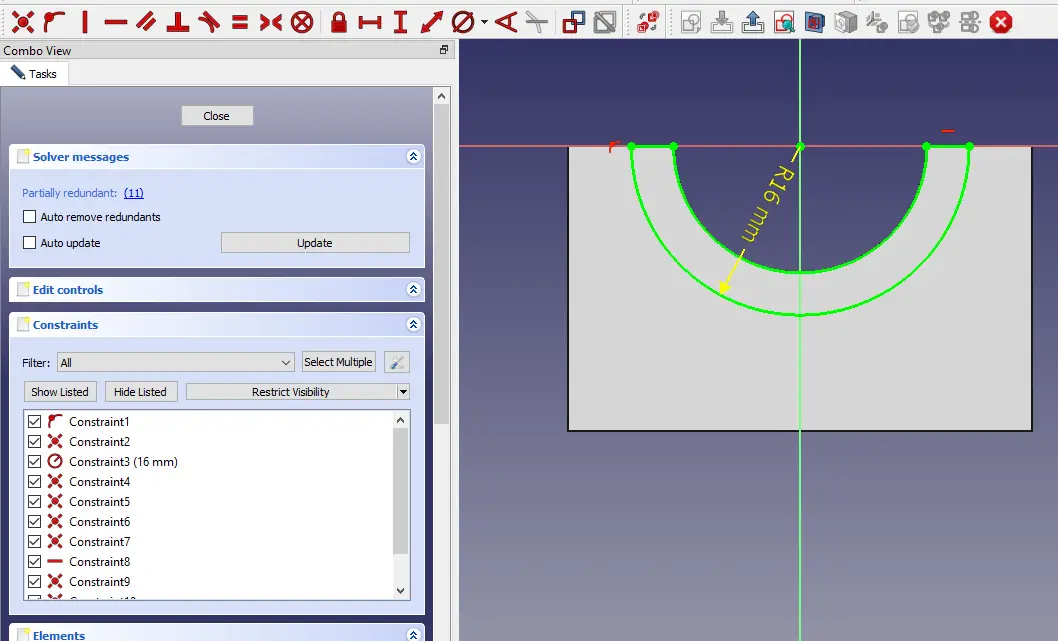
STEP 04-: Now create below profile by projecting arc and create arc of dimension R16 and fully constrained it as shown in below image.
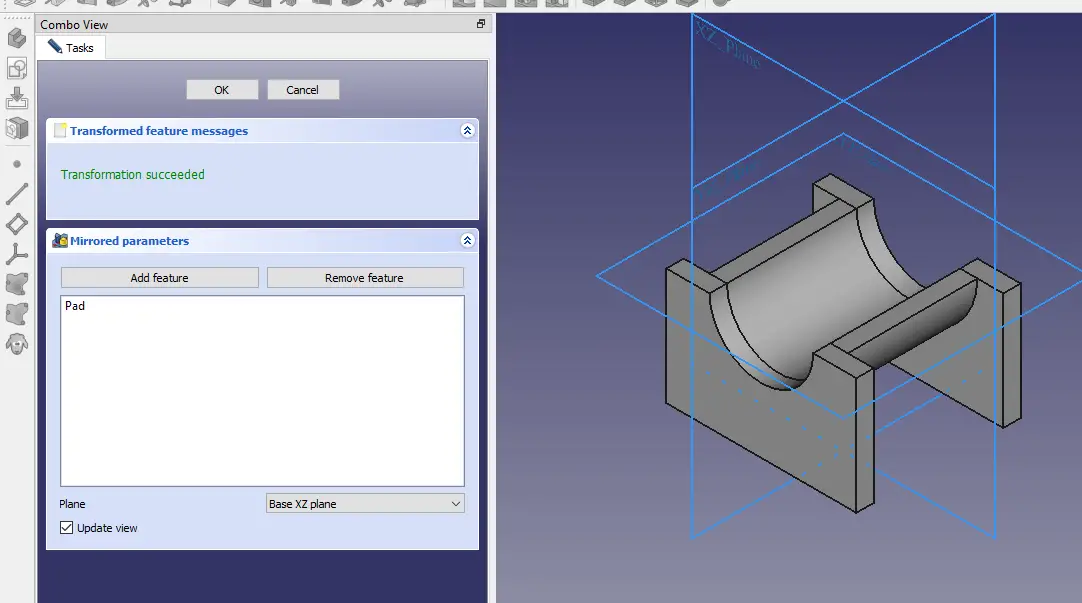
STEP 05-: Now Mirror the feature with respect to XZ plane.
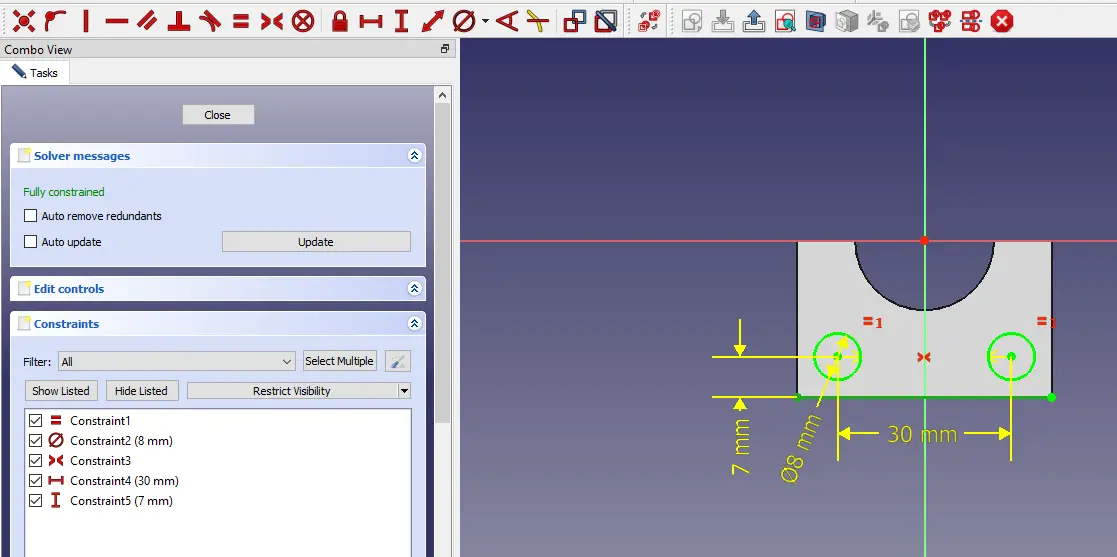
STEP 06-: Now create the below profile. it is plane hole so I have used extrude cut feature. you can make this feature with the help of hole feature as well.
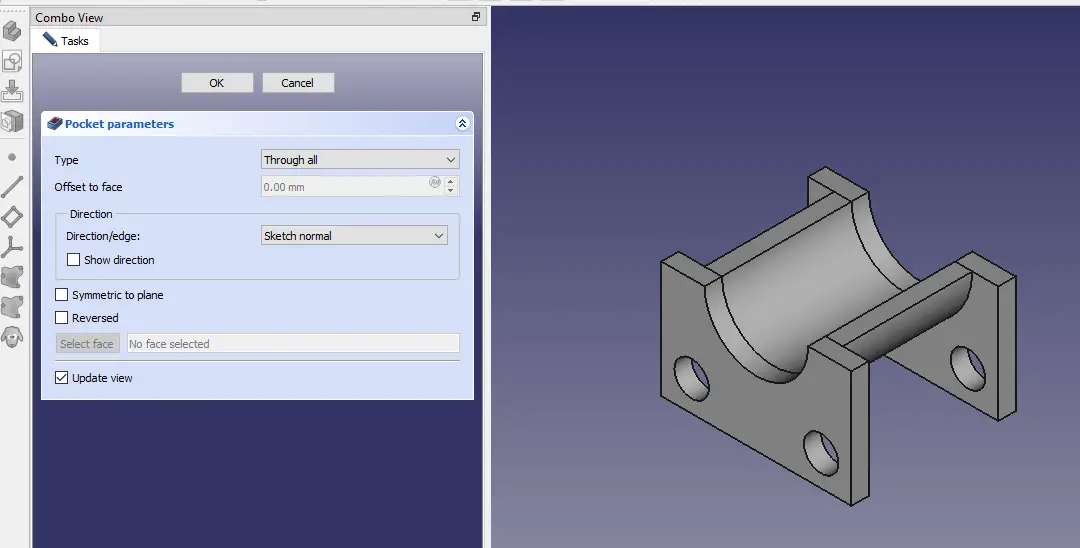
STEP 06-: Now remove the material and end condition is Through All.
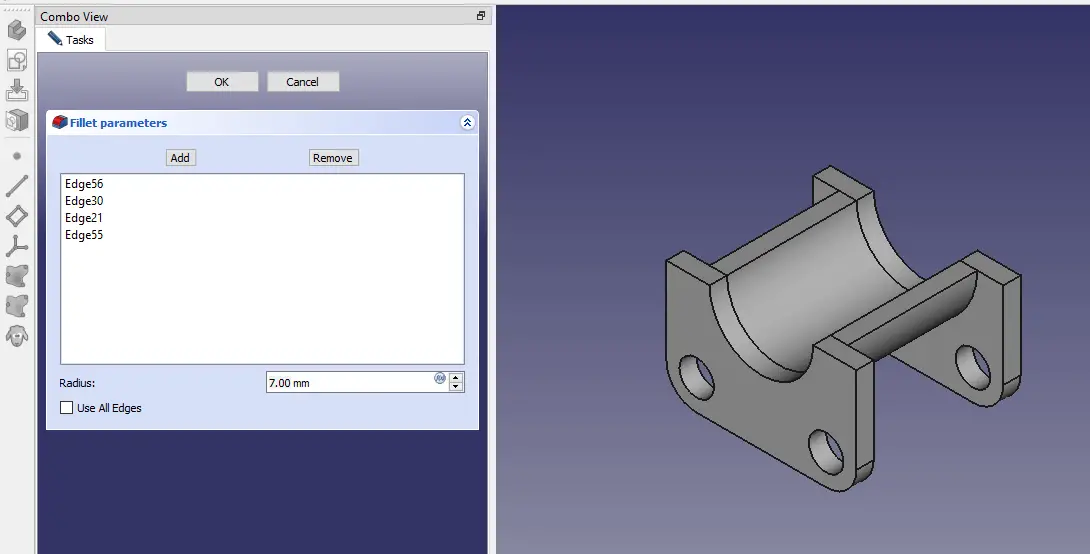
STEP 07-: Now select the all four corner and give fillet of 7mm.
“Thank you for reading! If you found this article insightful and valuable, consider sharing it with your friends and followers on social media. Your share can help others discover this content too. Let’s spread knowledge together. Your support is greatly appreciated!”