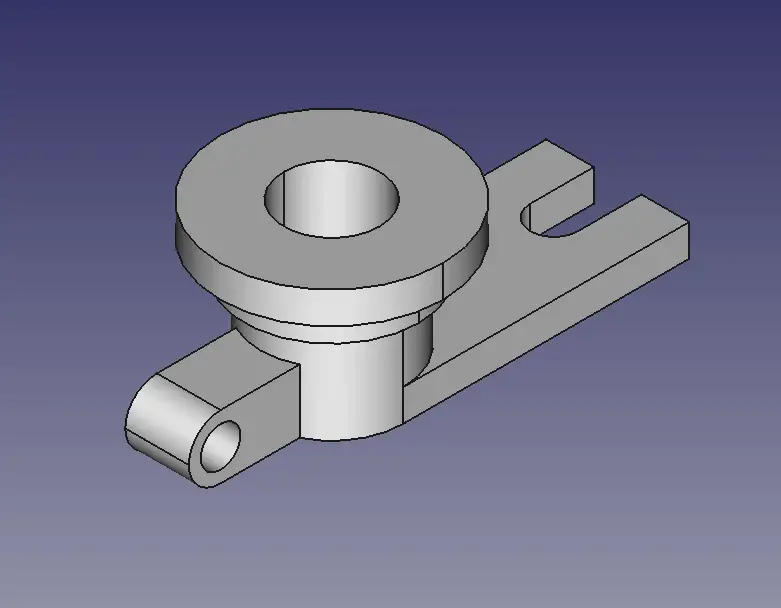
Welcome to FreeCAD Part Modeling Tutorial 34 In this Tutorial I have explained How to Model above part in FreeCAD. This Tutorial is designed for beginner user to understand part design Workbench in FreeCAD and basic modeling approach in FreeCAD.

Also Read:
- Meaning of PN and DN in Valves
- Select Shaft Diameter with respect to Bearing Number
- Render FreeCAD Part in CADRays
Step by Step Guide to Convert below drawing into 3D Model -:
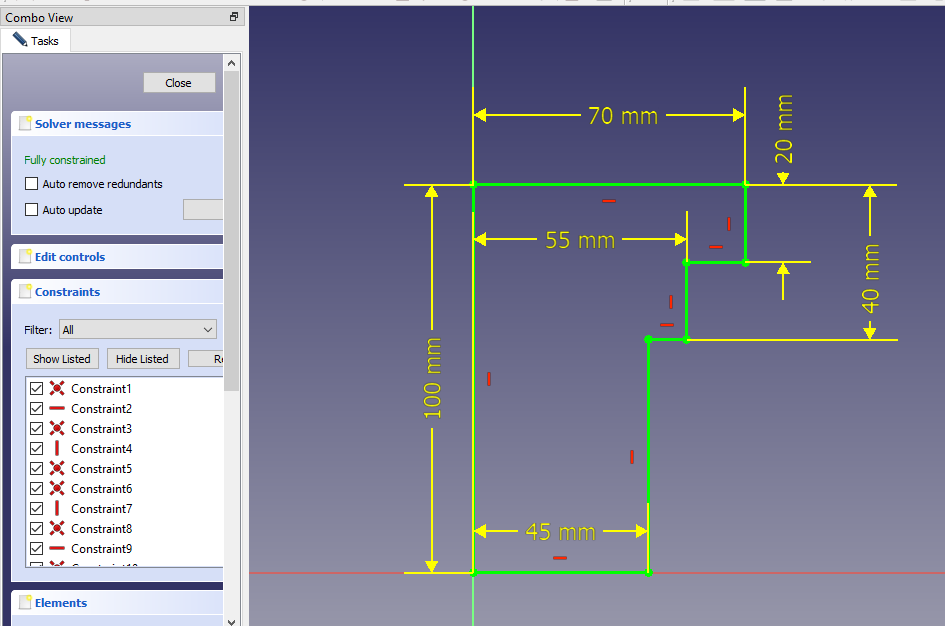
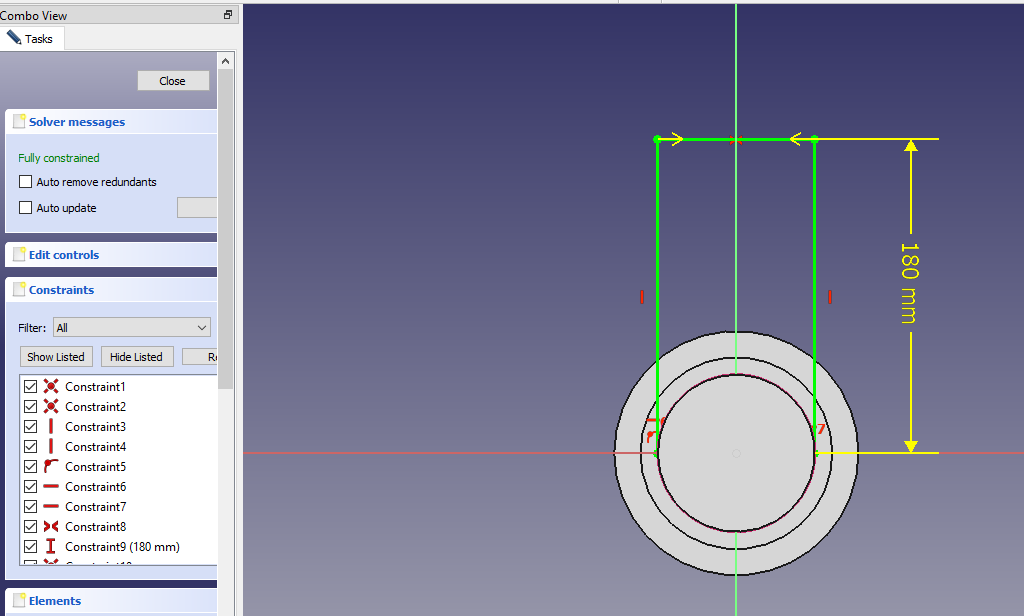
STEP 01-: Create the sketch as shown in below image.
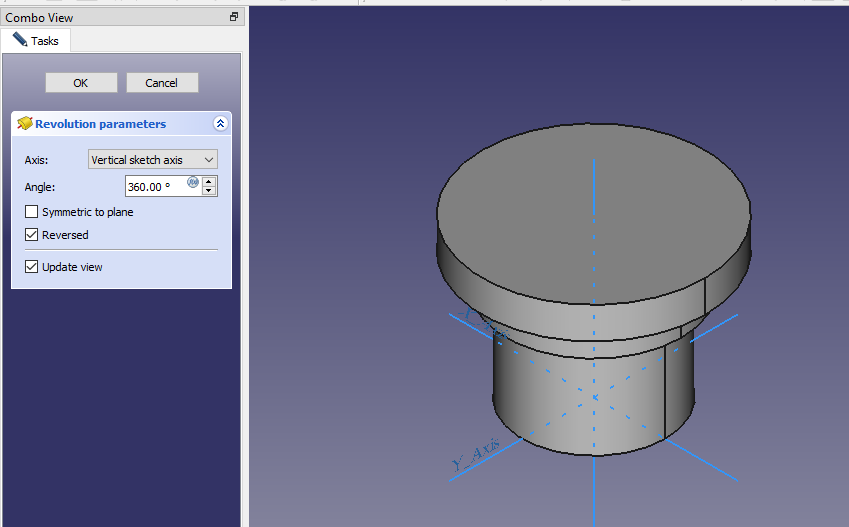
STEP 02-: once the sketch is fully constrained exit from the sketch and revolve it.
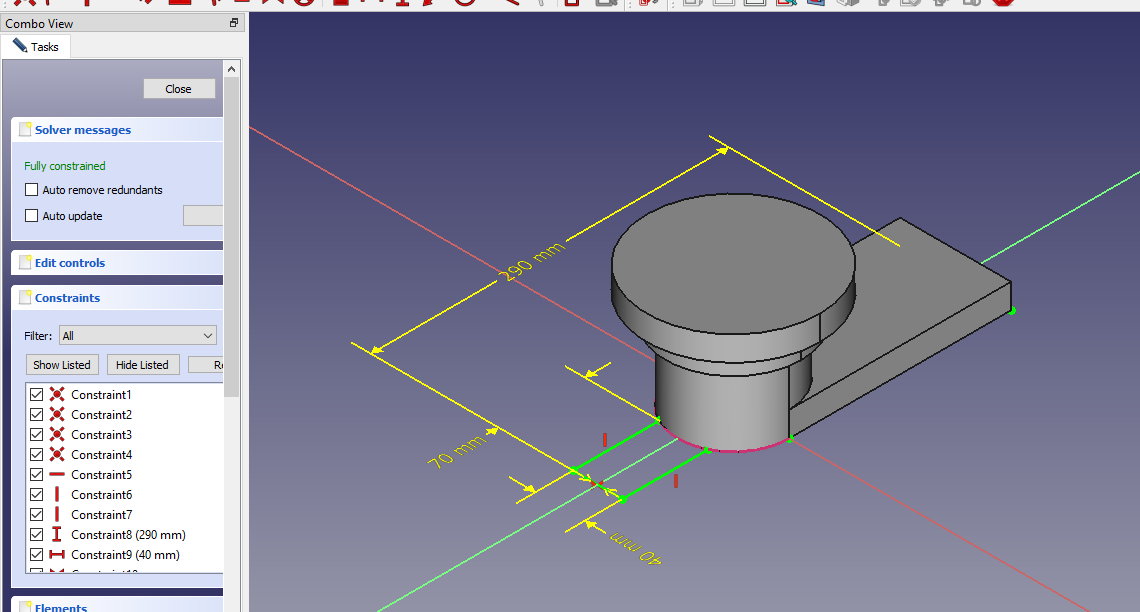
STEP 03-: Now select the bottom face of the part and create the sketch as shown.
STEP 04-: Now again select the bottom face and create the sketch as shown in the below image.
STEP 05-: Now select the sketch and create the profile as shown in below image.
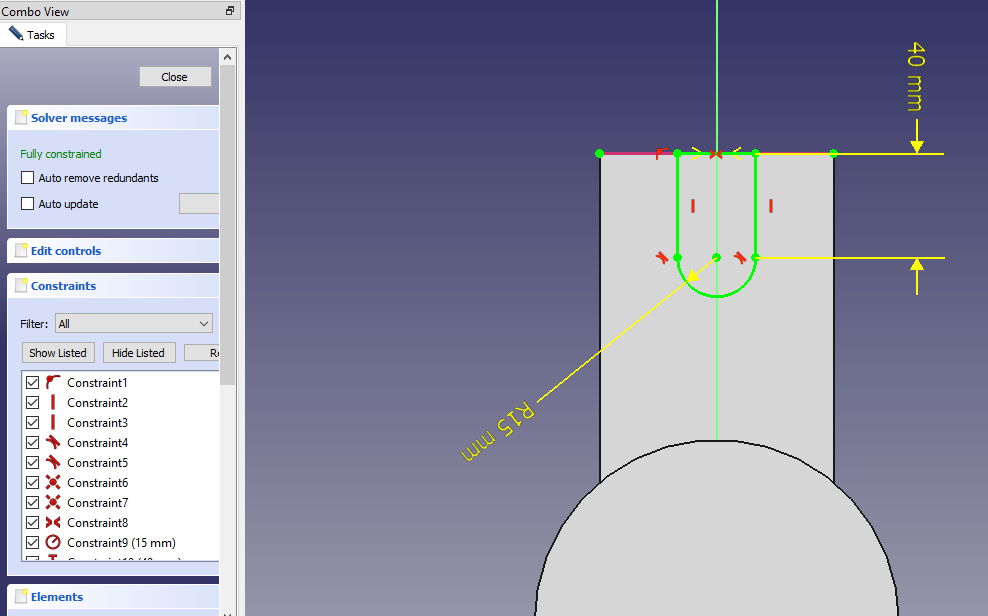
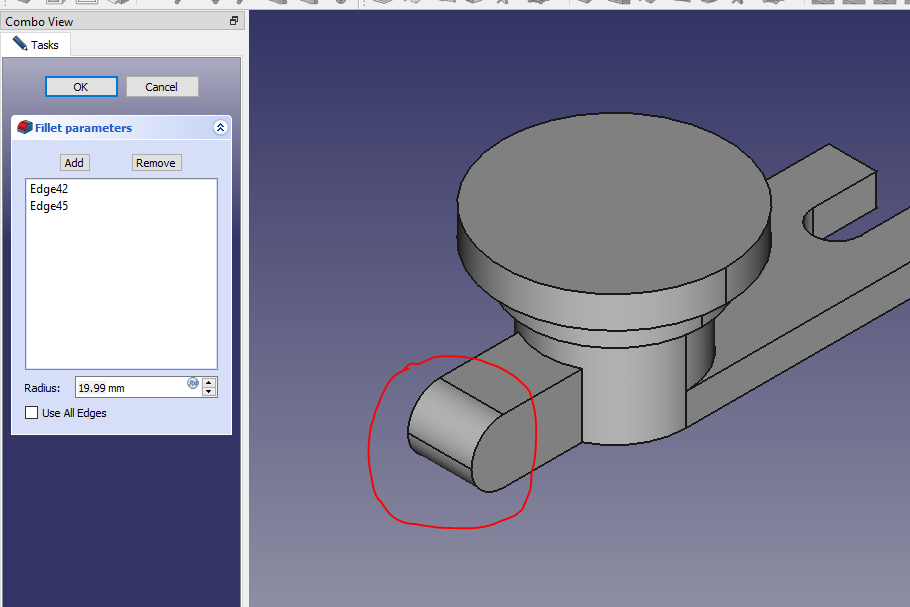
STEP 06-: Now select the sketch and create the fillet of 20 mm.
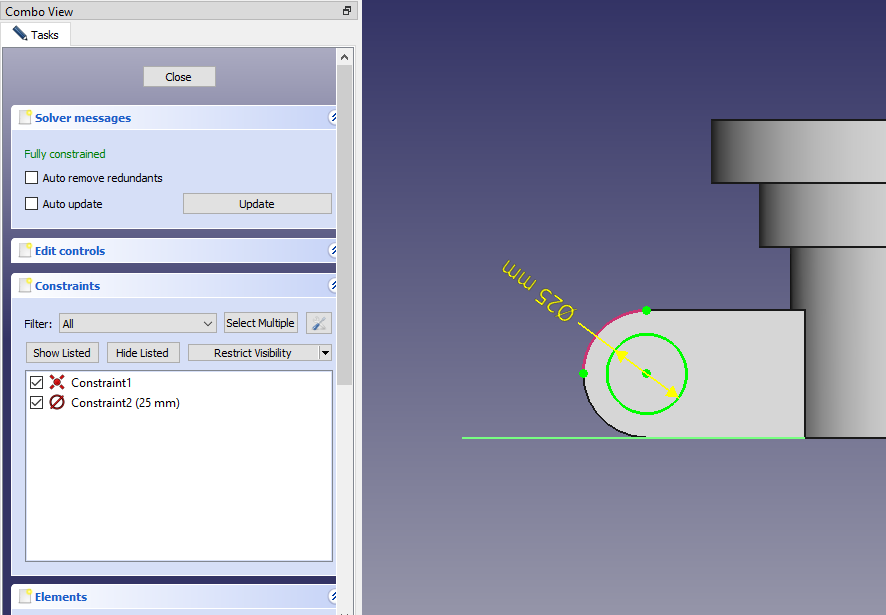
STEP 07-: Now select the face and create the sketch for hole dia 25.
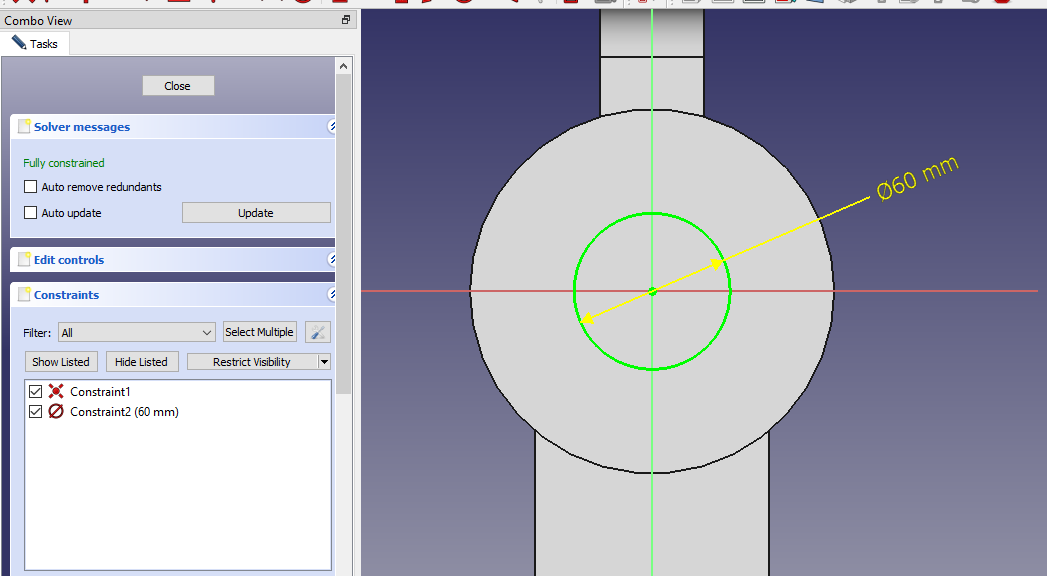
STEP 08-: Now select the top face and create the sketch of diameter 60 and then complete remove the material.
“Thank you for reading! If you found this article insightful and valuable, consider sharing it with your friends and followers on social media. Your share can help others discover this content too. Let’s spread knowledge together. Your support is greatly appreciated!”