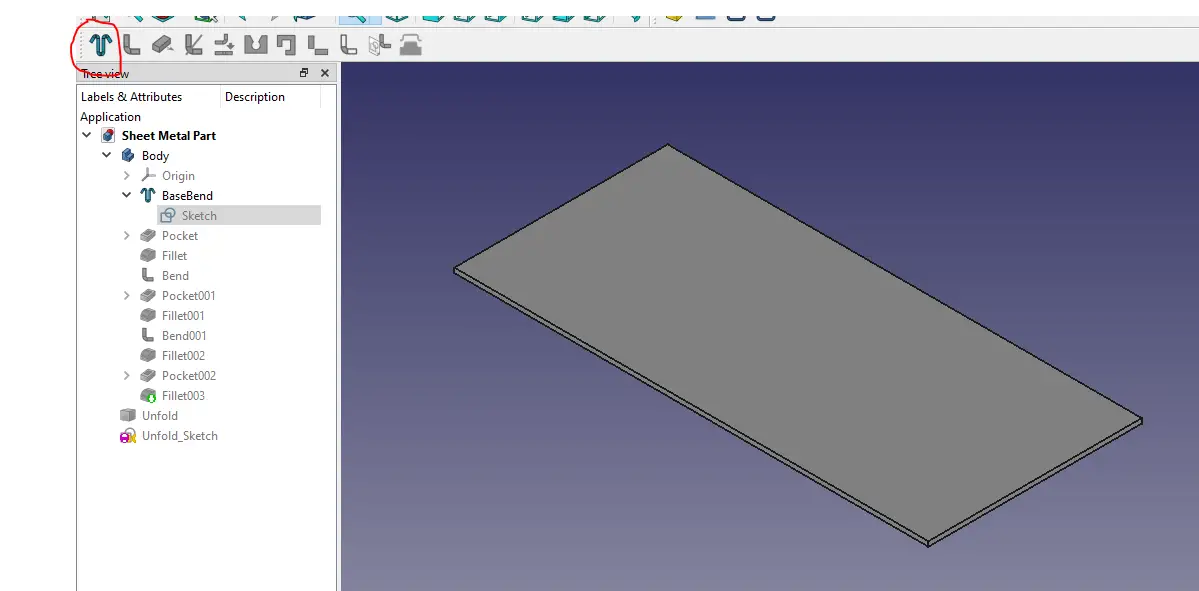
In this Tutorial we will model above sheet metal part in FreeCAD step by step with the help Sheet Metal Workbench in FreeCAD. In this Tutorial we will learn all major commands of FreeCAD Sheet Metal Workbench.
Also Read-:
| How to Clone and Rotate Body in FreeCAD |
| How to use Multi View in FreeCAD Drawing |
| Let’s understand FreeCAD Part Workbench |
Step by Step Guide to Convert below drawing into 3D Model -:
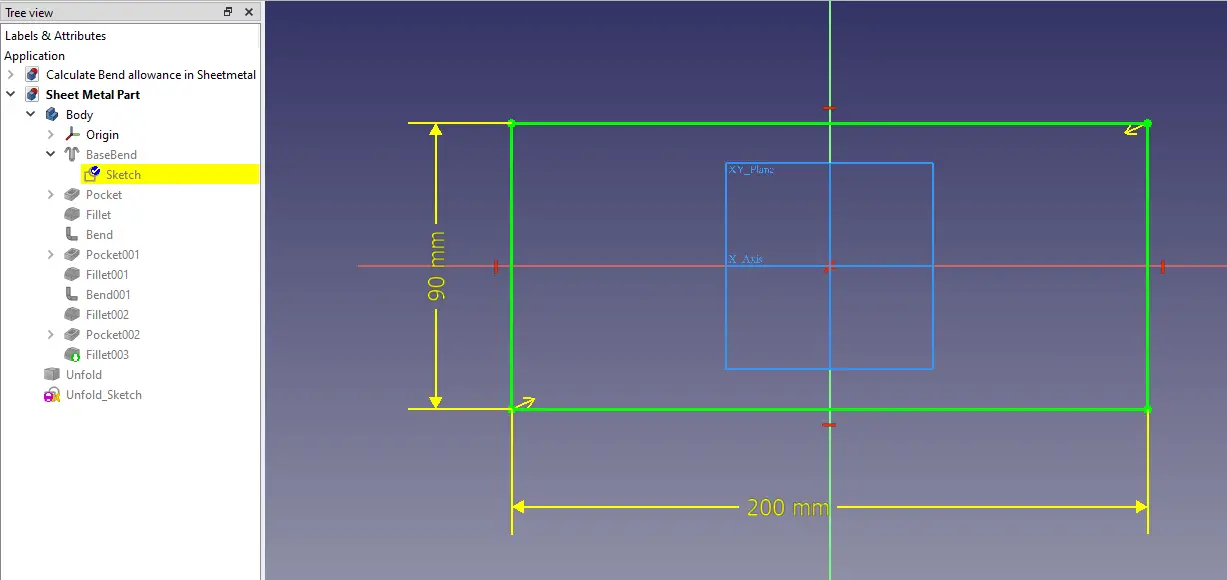
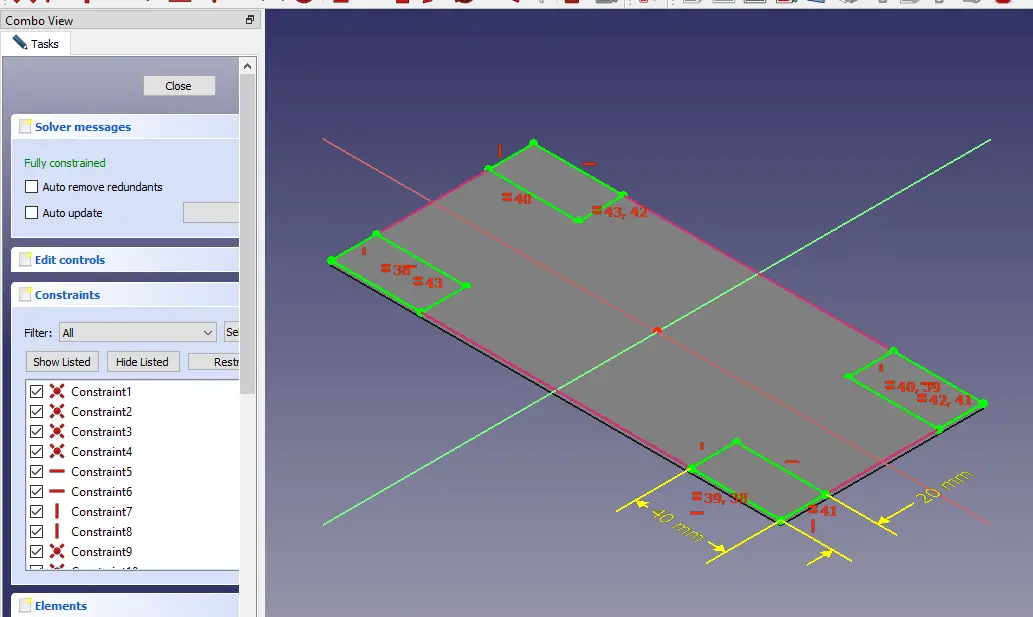
First activate the sheet Metal Workbench if it is not installed then then install it by going to Tools==.>> Add on Manager and search for Sheet Metal Workbench and install it. Once you install Sheet Metal Workbench Select the top plane and create the sketch as shown in Above image a simple rectangle of 90X200 mmm.
and then click on base wall feature a flat sheet will be created. you can change the thickness of your sheet metal part and other parameter by going to data tab. as shown in below image.

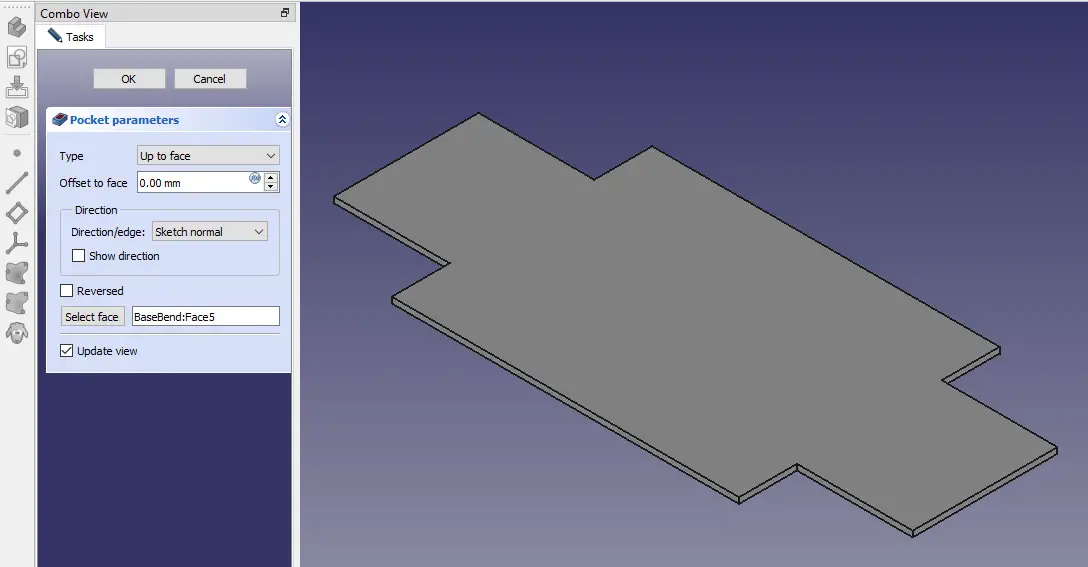
Now switch to Part Design Workbench and create 4 rectangular sketches of 20×40 mm to remove the material.
Now select up to face or Through all end condition and remove the material.
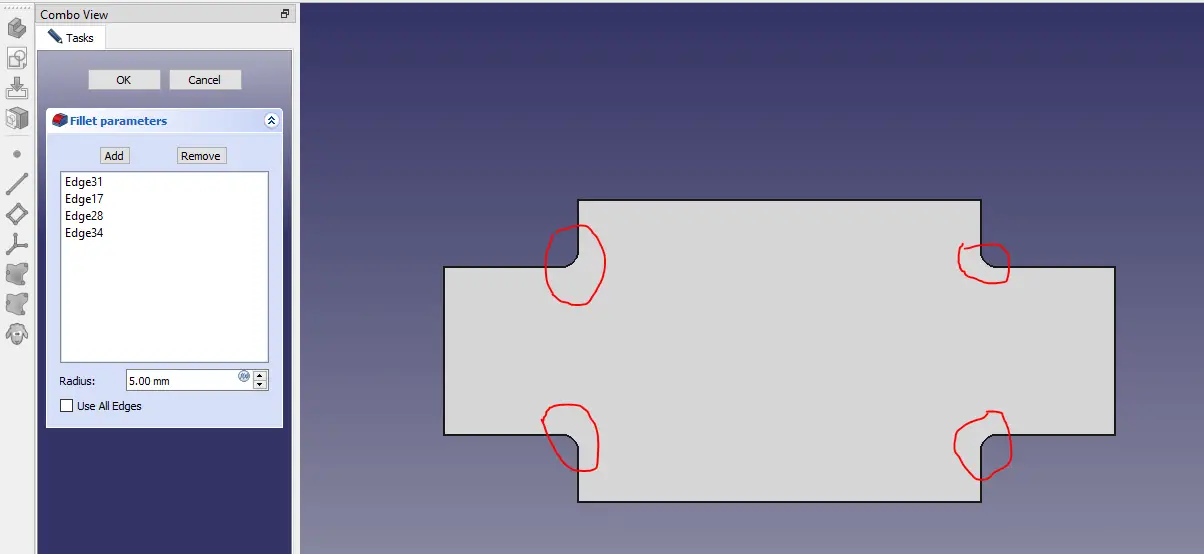
Now select all 4 four corners and apply the fillet of 5mm. as shown in below image.
Now select all 4 edges and click on bend and then go the property manager set length to 50mm and other property as per below image.

Now select top face and create sketch as shown in below image.

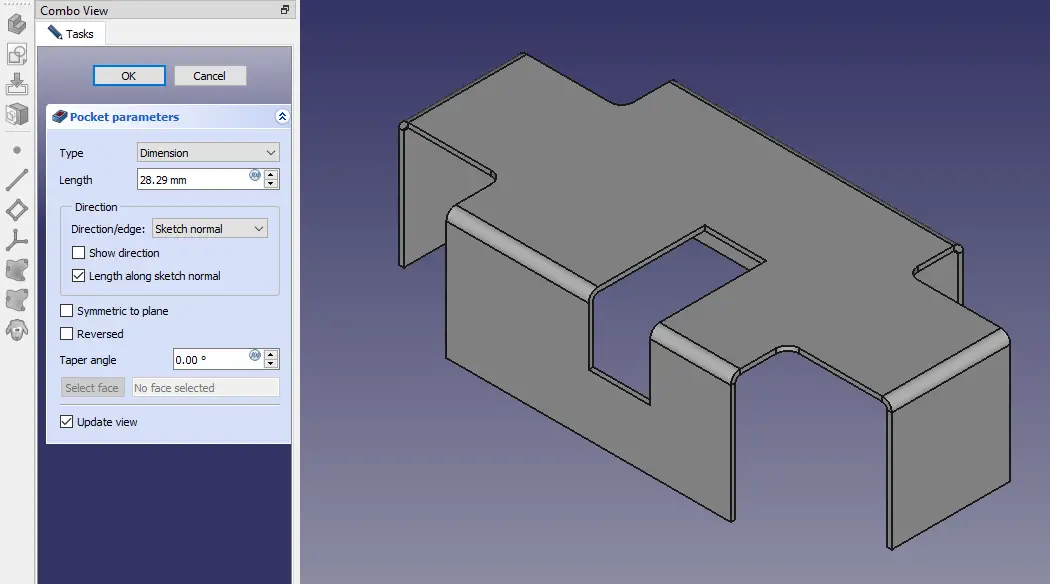
Now Make Cut depth of 28.29 as Show in Below Image
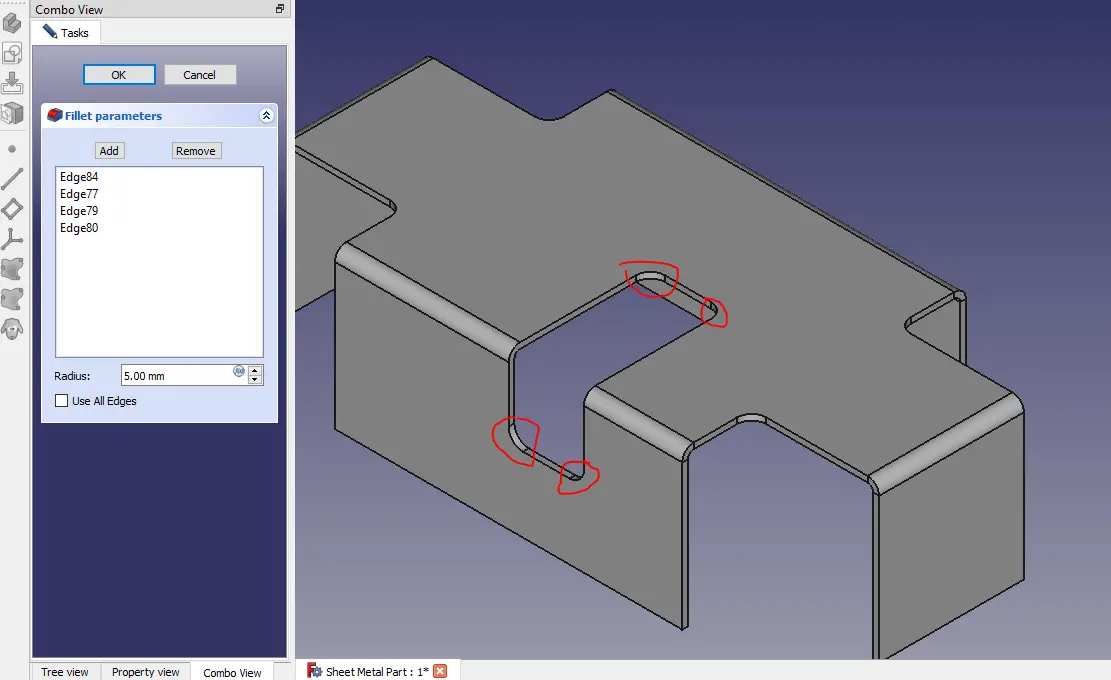
Now give fillet to all four corners of cut.
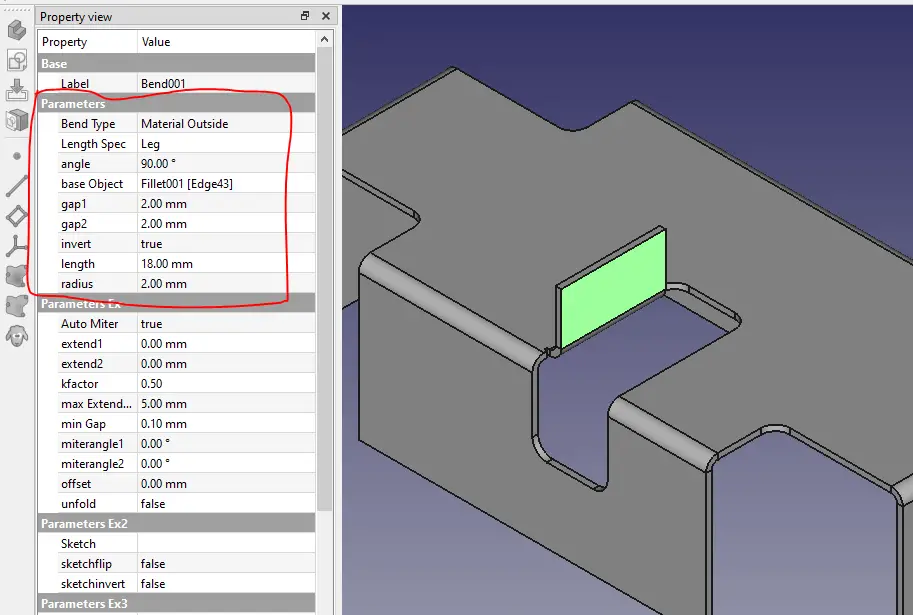
Now select the cut edge and give the bends of 18mm and other parameter shown in the image.
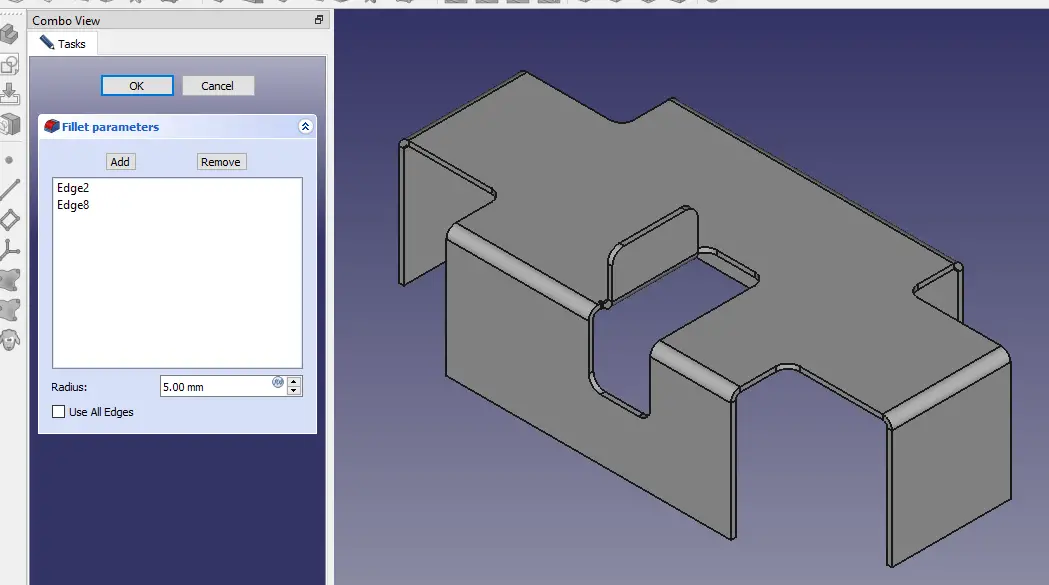
Now give fillet to the corner of the created flange.
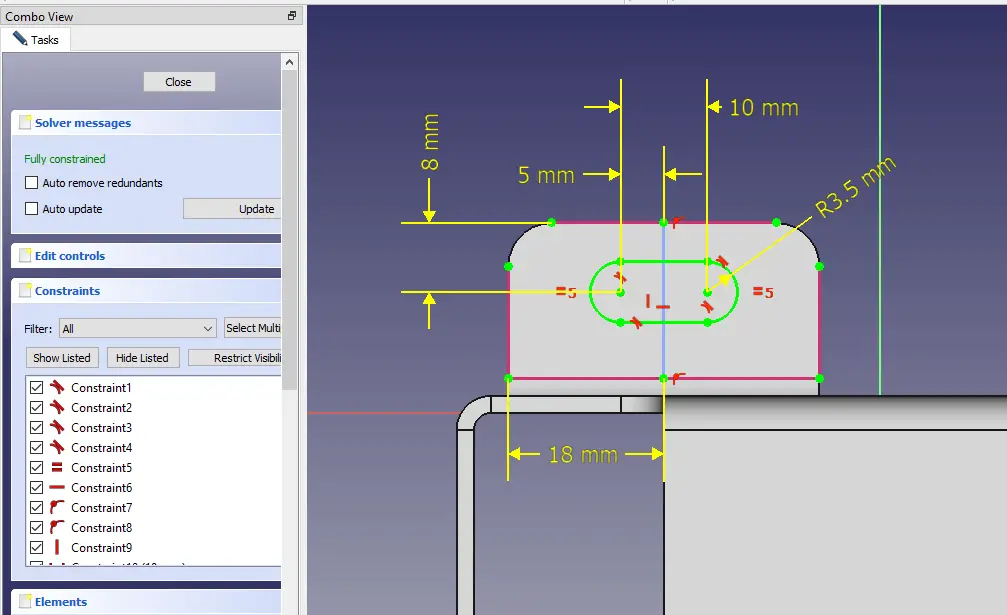
Now on our Created flange create a slot as per shown sketch and make the Cut.
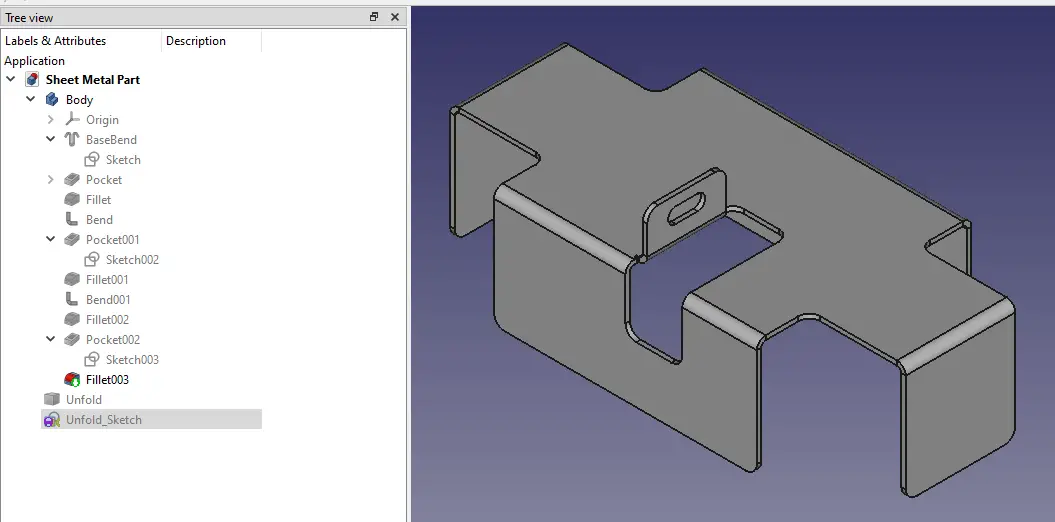
Now at the end apply 5mm fillet to the all corners of the part. Now Click on Top face and then click on Unfold view to make flat pattern or development view.
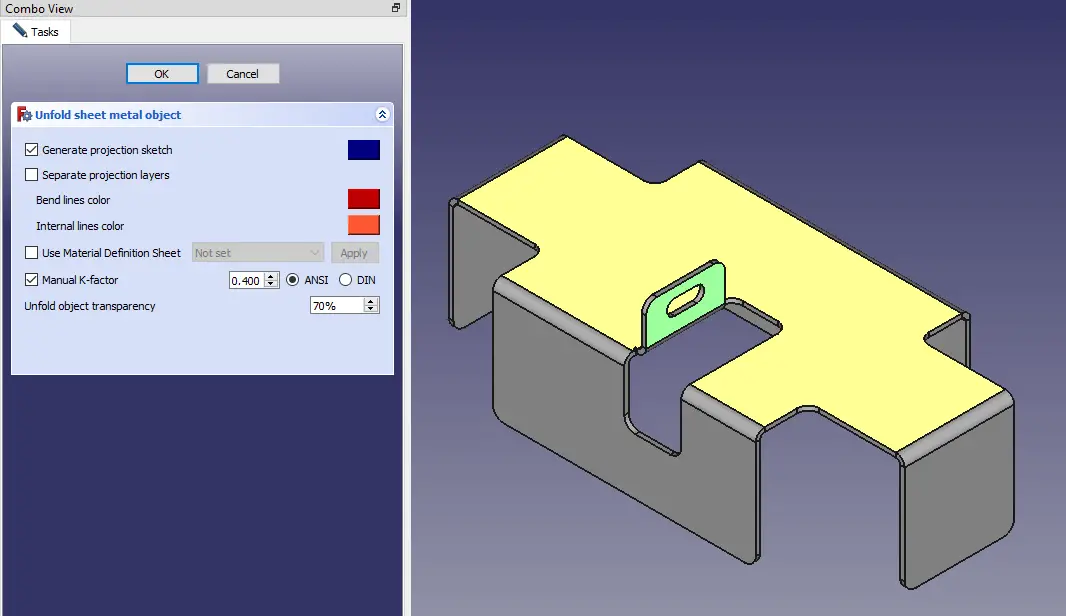
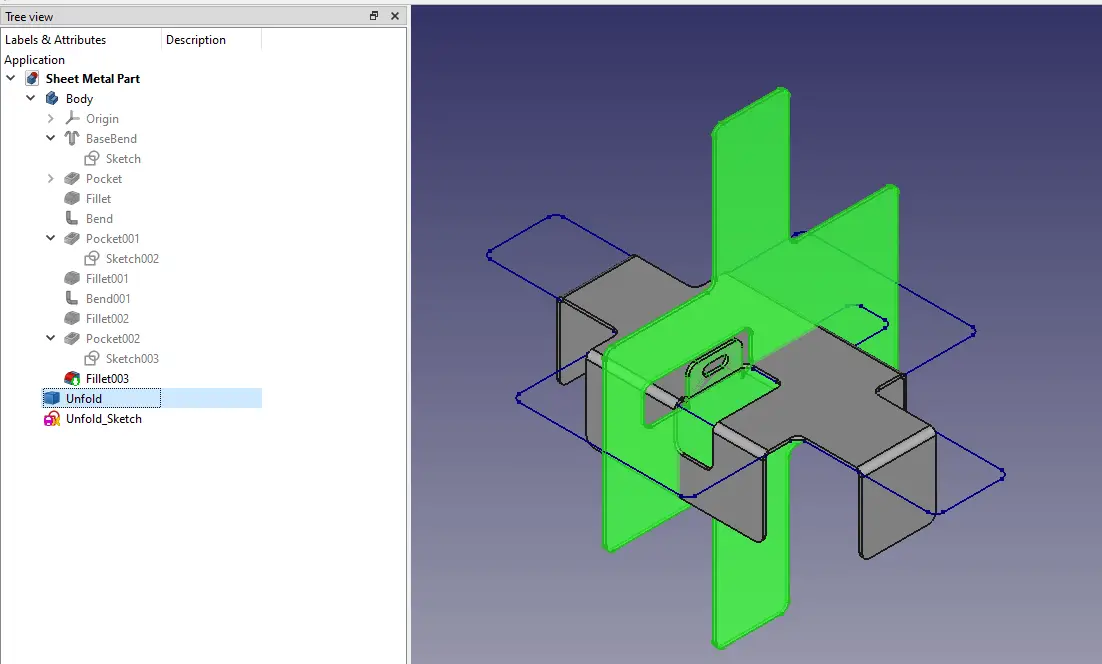
Our Development view is created with unfolded solid and Sketch which can be easily converted into DXF.
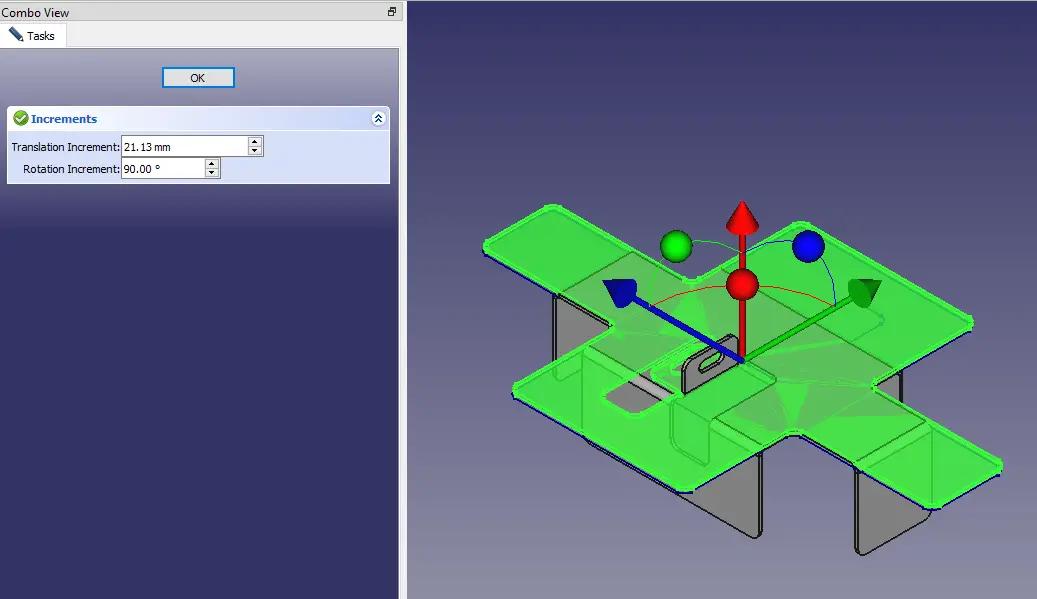
Unfolded Solid can be easily rotated with the help of transform tool.
This is How to Model sheet metal part in FreeCAD. I hope you have like this Tutorial How to Model Sheet Metal Part in FreeCAD with the help of FreeCAD Sheet metal Workbench if you like this tutorial then please share it and if you have any suggestion then give your valuable suggestion in comment section.
“Thank you for reading! If you found this article insightful and valuable, consider sharing it with your friends and followers on social media. Your share can help others discover this content too. Let’s spread knowledge together. Your support is greatly appreciated!”