Python is a programming language that it relatively easy to learn and understand. It is open-source and multi-platform, and can be used for many purposes: from simple shell scripts to very complex programs. But its most widespread use is as a scripting language embedded in other applications. That is how it is used inside FreeCAD. From the Python console, or from custom scripts, you can control FreeCAD and make it perform very complex operations.
For example, from a Python script, you can:
- Create new objects.
- Modify existing objects.
- Modify the 3D representation of those objects.
- Modify the FreeCAD interface.
There are several ways to use Python in FreeCAD:
- From the FreeCAD Python interpreter, where you can issue commands in a “command line”-style interface.
- From macros, which are a convenient way to quickly add a missing tool to the FreeCAD interface.
- From external scripts, which can used to create quite complex solutions, even entire Workbenches.
FreeCAD’s integration with Python makes it a powerful tool for automating repetitive tasks, customizing workflows, and extending functionality. Whether you’re a beginner or an experienced programmer, you can use Python to enhance your FreeCAD experience. Here’s a guide to automating your workflow with FreeCAD and Python.
Also Read-:
| Tips to 3D Print FreeCAD Models to Get the Best Results |
| Master FreeCAD: Top Free Learning Resources to Enhance Your Skills |
| Benefits of FreeCAD Realthunder Branch |
1. Why Use Python in FreeCAD ?
Python is chosen as the scripting language in FreeCAD due to its versatility, simplicity, and widespread usage within the engineering and design industries. As a dynamic programming language, Python allows users to create complex scripts and automate repetitive tasks within FreeCAD with ease. It offers a wide range of libraries and modules that can be easily integrated into FreeCAD, expanding its capabilities for 3D modeling and simulation.
Additionally, Python provides seamless interoperability with other CAD software and engineering tools, making it an ideal choice for professionals looking to streamline their workflow and enhance productivity. Its intuitive syntax and extensive documentation also make it an accessible option for both experienced developers and beginners in the field of computer-aided design. Overall, using Python in FreeCAD enhances efficiency, flexibility, and creativity in professional design projects.
- Automation: Automate repetitive tasks like creating geometry, applying constraints, or exporting files.
- Customization: Create custom tools and workbenches tailored to your needs.
- Extensibility: Extend FreeCAD’s functionality with scripts and macros.
- Parametric Design: Dynamically control model parameters using Python scripts.
Also Read-:
| Import Autodesk Inventor Part in FreeCAD |
| How to use Texture Mapping in FreeCAD |
| Switch to FreeCAD Advance Cube Navigation Menu |
2. Getting Started with Python in FreeCAD-:

When delving into the world of computer-aided design (CAD), mastering a powerful scripting language like Python can significantly enhance your capabilities. FreeCAD, an open-source parametric 3D modeler, offers seamless integration with Python to automate tasks, create complex designs, and customize workflows. To get started with Python in FreeCAD, one must first familiarize themselves with the basic syntax and functions of Python programming language.
Next, understanding FreeCAD API documentation is crucial in order to leverage its extensive library of commands and classes for creating and manipulating 3D models. By combining Python’s flexibility and FreeCAD’s robust features, professionals can streamline their design processes, simplify repetitive tasks, and ultimately achieve greater efficiency and precision in their CAD projects. FreeCAD has a built-in Python console and macro editor, making it easy to write and test scripts.
Related posts:
- Model Involute Gear in FreeCAD
- Let’s understand FreeCAD Part Workbench
- Let’s Explore the FreeCAD user Interface
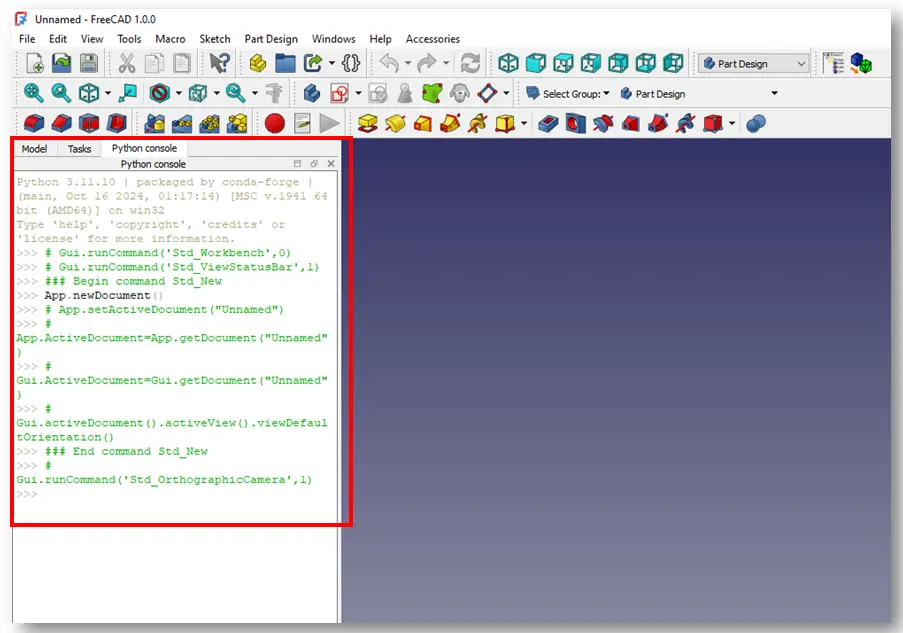
a. Python Console:
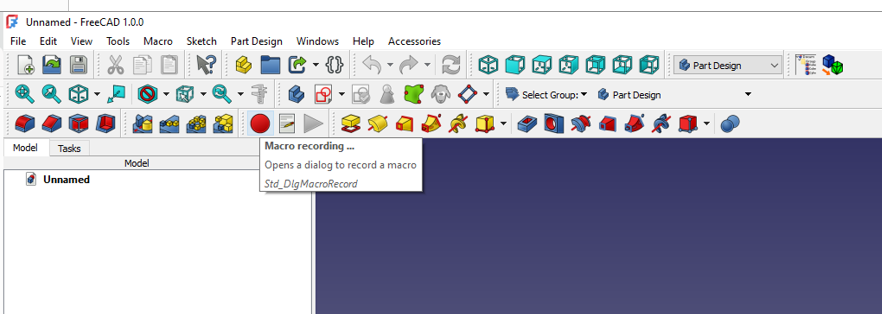
In the Python console (select View → Panels → Python console from the menu) or in the Macro editor (select Macro → Macros… from the menu). In the console you write Python commands one by one, executing them by pressing Enter.
- Open the Python console:
View > Panels > Python Console. - Use the console to execute Python commands interactively.
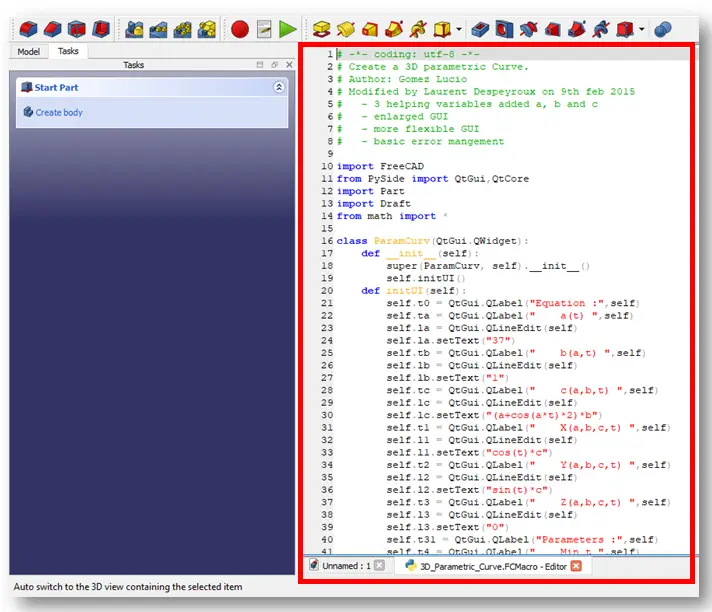
b. Macro Editor:
FreeCAD Macros can contain more complex code made up of several lines, executed only when the macro is executed.
- Open the macro editor:
Macro > Macros > Edit. - Write, save, and run Python scripts as macros.
Related posts:
- Setup Auto Spacing in FreeCAD Sketcher
- Easily Slice Part with Plane in FreeCAD
- Insert Surface Finish Symbol in FreeCAD Drawing
3. Basic Python Scripting in FreeCAD-:
Here are some basic examples to get you started:
a. Create a Simple Cube:
import FreeCAD as App
import Part

# Create a cube
cube = Part.makeBox(10, 10, 10)  # Dimensions: 10x10x10
App.ActiveDocument.addObject("Part::Feature", "Cube").Shape = cube
App.ActiveDocument.recompute()
b. Create a Sketch and Pad It:
import FreeCAD as App
import Part
import Sketcher

# Create a new document
doc = App.newDocument()

# Create a sketch
sketch = doc.addObject("Sketcher::SketchObject", "Sketch")
sketch.addGeometry(Part.LineSegment(App.Vector(0, 0, 0), App.Vector(10, 10, 0)), False)
sketch.addConstraint(Sketcher.Constraint('Coincident', 0, 1, -1, 1))
sketch.addConstraint(Sketcher.Constraint('Horizontal', 0))

# Pad the sketch
pad = doc.addObject("PartDesign::Pad", "Pad")
pad.Profile = sketch
pad.Length = 10
doc.recompute()
Related posts:
4. Automating Repetitive Tasks-:
Use Python to automate tasks like creating multiple objects, applying constraints, or exporting files.
a. Create a Grid of Cylinders:
import FreeCAD as App
import Part

# Create a grid of cylinders
for i in range(5):
    for j in range(5):
        cylinder = Part.makeCylinder(2, 10, App.Vector(i * 10, j * 10, 0))
        App.ActiveDocument.addObject("Part::Feature", f"Cylinder_{i}_{j}").Shape = cylinder
App.ActiveDocument.recompute()
b. Batch Export Files:
import FreeCAD as App
import Mesh

# Export all objects in the document to STL
for obj in App.ActiveDocument.Objects:
    if obj.isDerivedFrom("Part::Feature"):
        Mesh.export([obj], f"{obj.Name}.stl")
Related posts:
- How to Clone and Rotate Body in FreeCAD
- Free Online Tool to View CAD Files
- Easily Rotate Sketch in FreeCAD
5. Using Macros in FreeCAD-:
Macros are reusable Python scripts that can be saved and run in FreeCAD.
a. Record a Macro:
- Go to
Macro > Macros > Record. - Perform the actions you want to automate.
- Stop recording and save the macro.
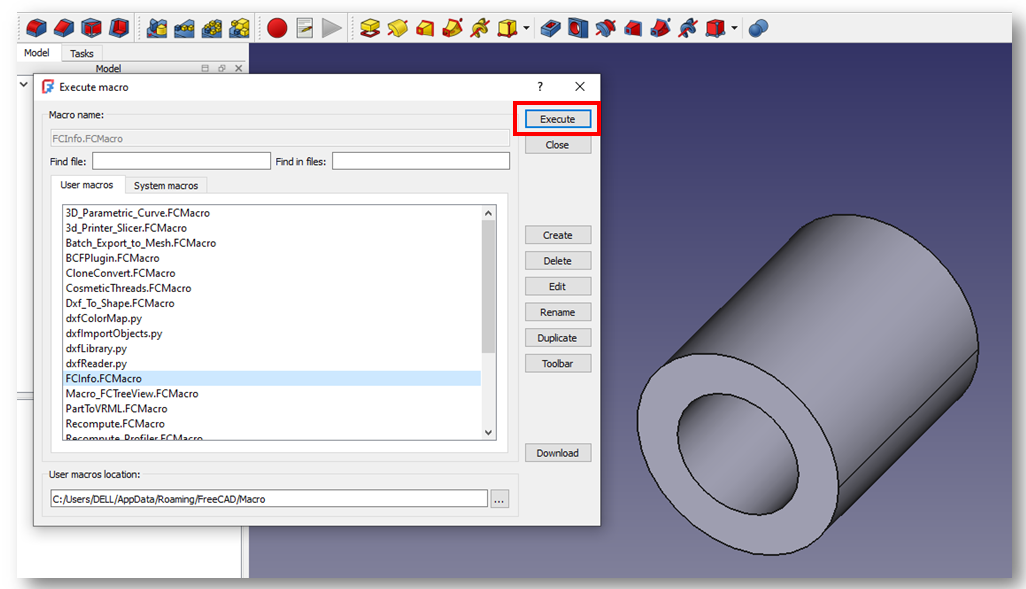
b. Run a Macro:
- Go to
Macro > Macros. - Select the macro and click
Execute.
c. Example Macro: Create a Bolt:
import FreeCAD as App
import Part

# Create a bolt head
head = Part.makeCylinder(5, 5, App.Vector(0, 0, 0))
# Create a bolt shaft
shaft = Part.makeCylinder(3, 20, App.Vector(0, 0, 5))
# Combine the head and shaft
bolt = head.fuse(shaft)
App.ActiveDocument.addObject("Part::Feature", "Bolt").Shape = bolt
App.ActiveDocument.recompute()
Related posts:
6. Advanced Scripting-:
For more advanced tasks, you can use FreeCAD’s API to interact with objects, properties, and the document structure.
a. Access Object Properties:
obj = App.ActiveDocument.getObject("Cube")
print(obj.Height)  # Access the height property
obj.Height = 20    # Modify the height property
App.ActiveDocument.recompute()
b. Create Custom Workbenches:
You can create custom workbenches by writing Python modules. Refer to the FreeCAD documentation for detailed instructions.
7. Debugging and Testing-:
- Use
print()statements to debug your scripts. - Test small snippets of code in the Python console before integrating them into larger scripts.
8. Learning Resources-:
- FreeCAD Wiki: Python Scripting Tutorial
- FreeCAD API Documentation: FreeCAD API
- Community Forums: FreeCAD Forum
9. Example: Automating a Design Workflow-:
Here’s an example of automating a design workflow for a parametric bracket:
import FreeCAD as App
import Part

# Parameters
length = 50
width = 30
thickness = 5
hole_radius = 3

# Create the base plate
base = Part.makeBox(length, width, thickness)

# Create holes
hole1 = Part.makeCylinder(hole_radius, thickness, App.Vector(10, 10, 0))
hole2 = Part.makeCylinder(hole_radius, thickness, App.Vector(length - 10, 10, 0))
hole3 = Part.makeCylinder(hole_radius, thickness, App.Vector(10, width - 10, 0))
hole4 = Part.makeCylinder(hole_radius, thickness, App.Vector(length - 10, width - 10, 0))

# Cut holes from the base plate
bracket = base.cut(hole1).cut(hole2).cut(hole3).cut(hole4)

# Add the bracket to the document
App.ActiveDocument.addObject("Part::Feature", "Bracket").Shape = bracket
App.ActiveDocument.recompute()
By leveraging Python in FreeCAD, you can automate your workflow, create custom tools, and significantly speed up your design process. Start with simple scripts and gradually explore more advanced features to unlock the full potential of FreeCAD!
Related posts:
- Essential FreeCAD Tips for Faster Modeling
- Basic Overview of FreeCAD Sketcher Workbench
- How to install FreeCAD Wiki documentation offline
“Thank you for reading! If you found this article insightful and valuable, consider sharing it with your friends and followers on social media. Your share can help others discover this content too. Let’s spread knowledge together. Your support is greatly appreciated!”
My FreeCAD Projects at Amount of Coffee-: