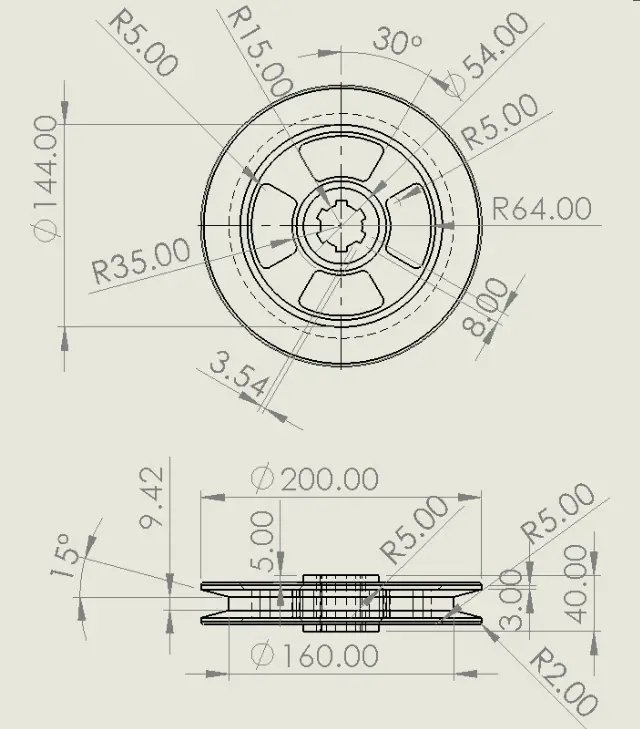
In our previous tutorial we have did FreeCAD Part Modeling Tutorial 48. In this Tutorial we will convert below sketch into 3D model. This Tutorial is designed for beginner user to understand part design Workbench in FreeCAD and basic modeling approach in FreeCAD.
Also Read-:
| Let’s Explore the FreeCAD user Interface |
| List of Supported File Formats in FreeCAD |
| Beginner Guide to Computer Aided Design |
Step by Step Guide to Convert below drawing into 3D Model -:
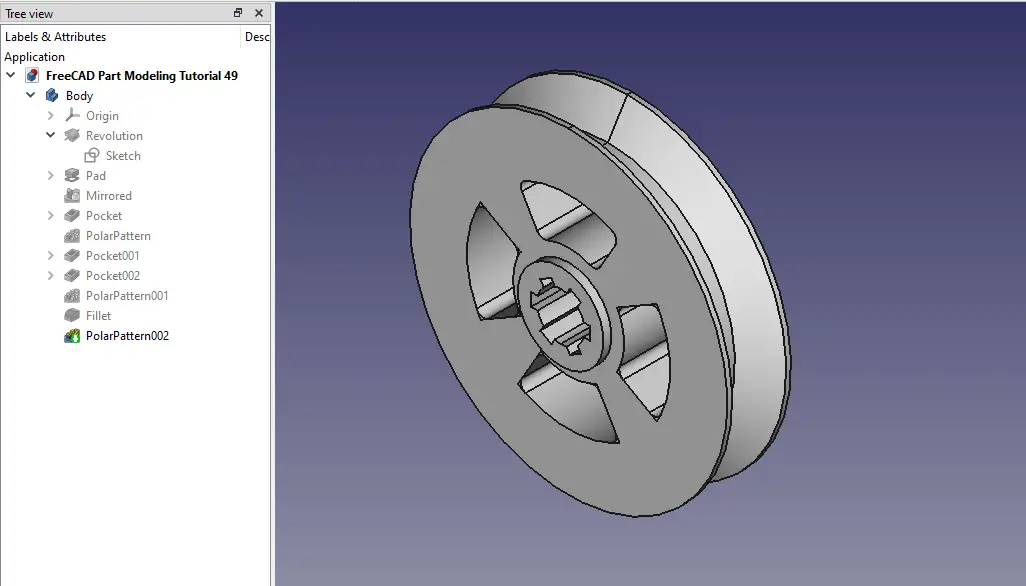
STEP 01-: Select the right plane and create the sketch as shown in below image.
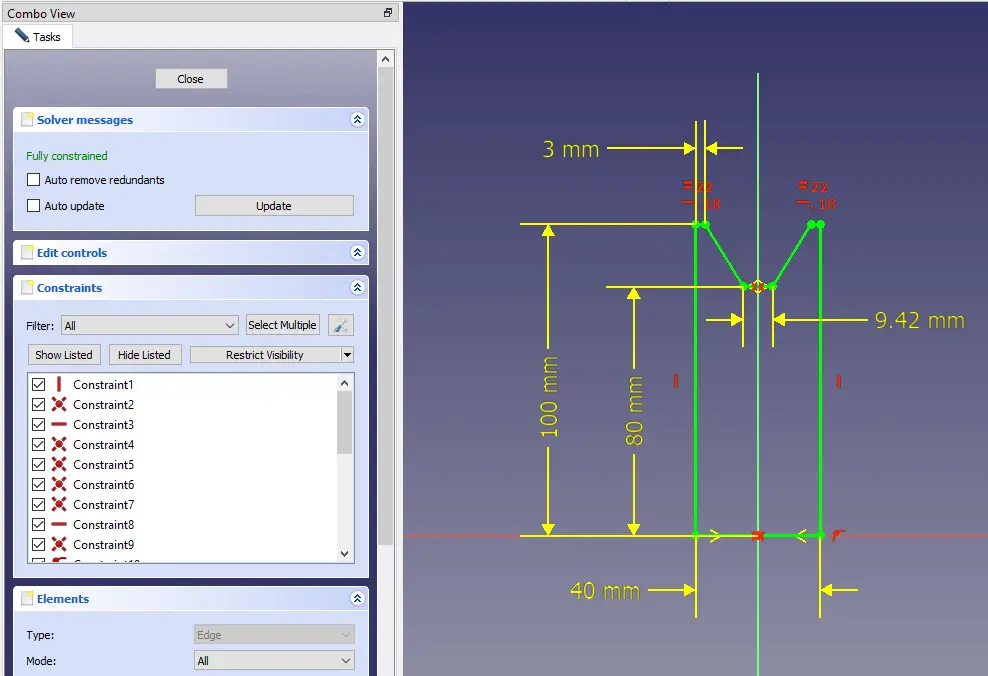
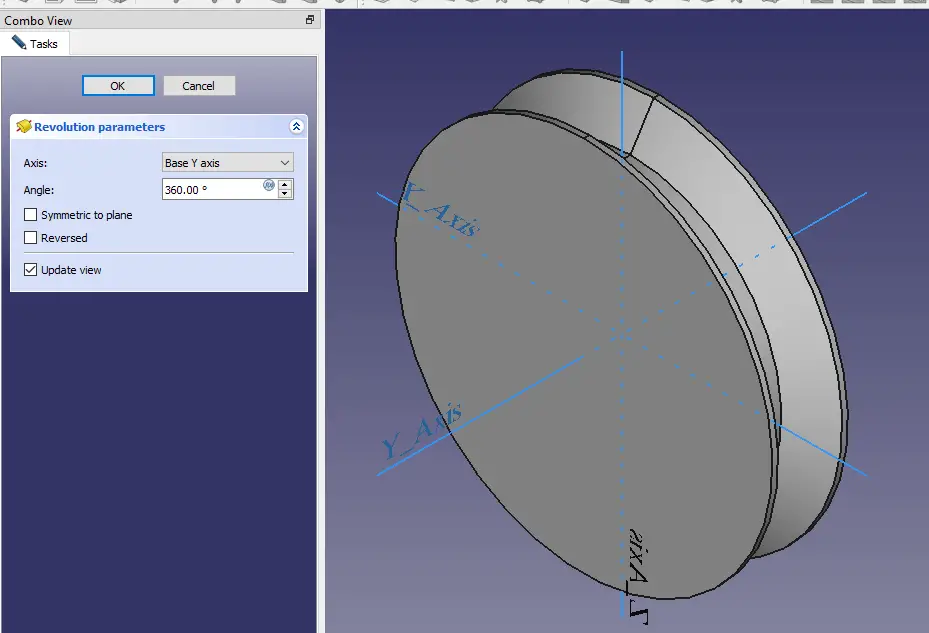
STEP 02-: Choose revolve feature and revolve it with respect to Y-Axis.
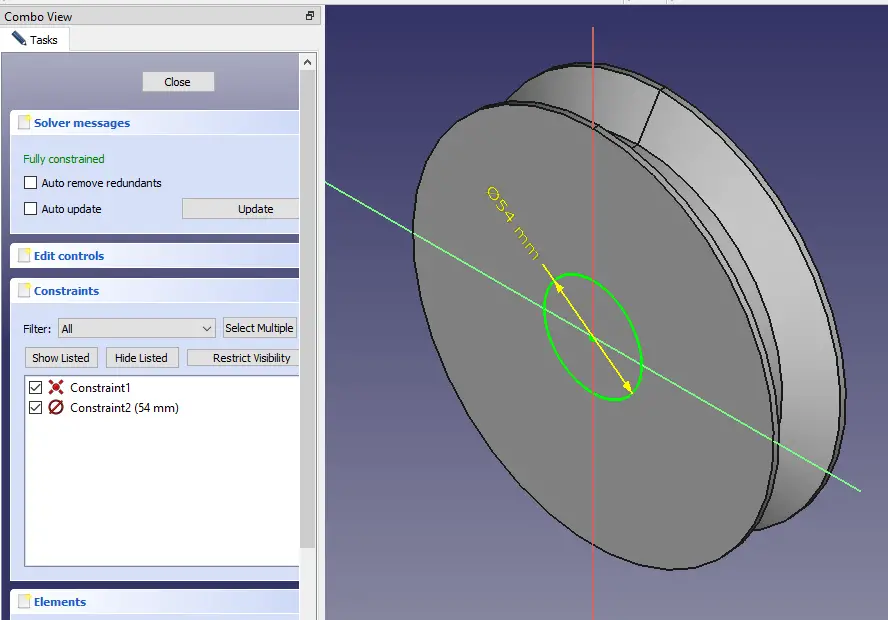
STEP 03-: Now select the face and create the circle of diameter 54.
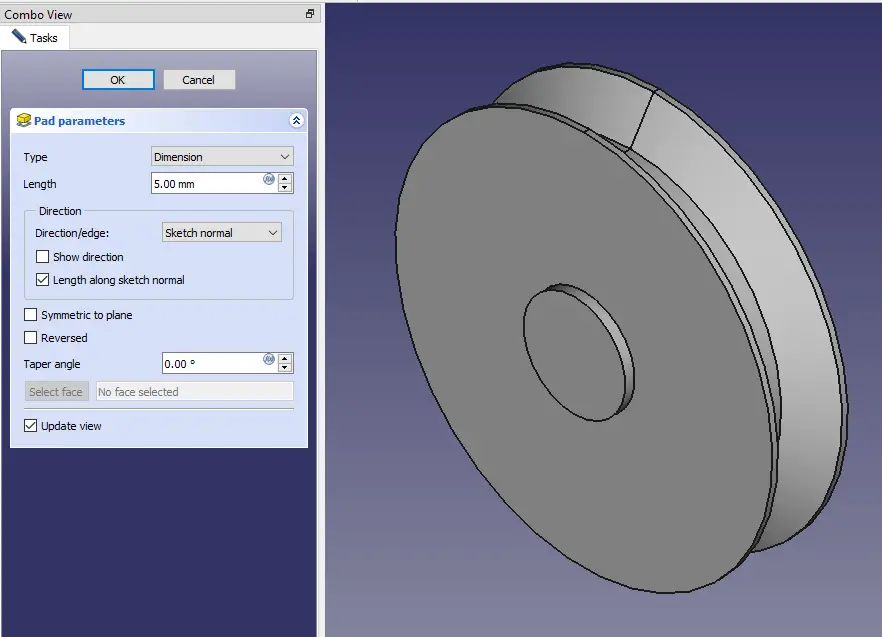
STEP 04-: Now Select Pad tool and extrude it to 5mm length as shown in below image.
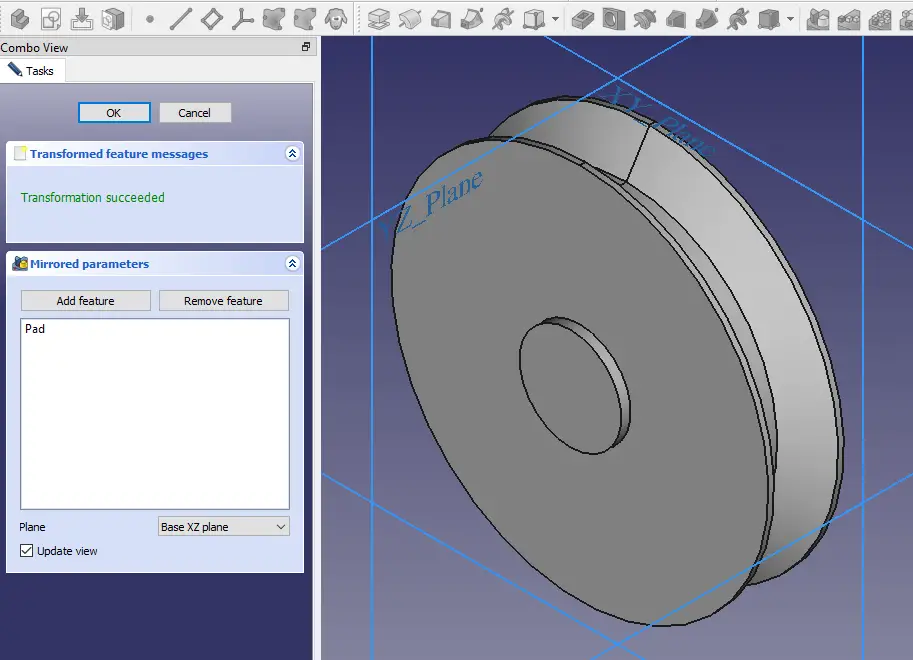
STEP 05-: Now use the mirror toll and mirror it with respect to XZ plane as shown in below image.
STEP 06-: Now select the face and create the sketch and use Pocket tool to remove the material.
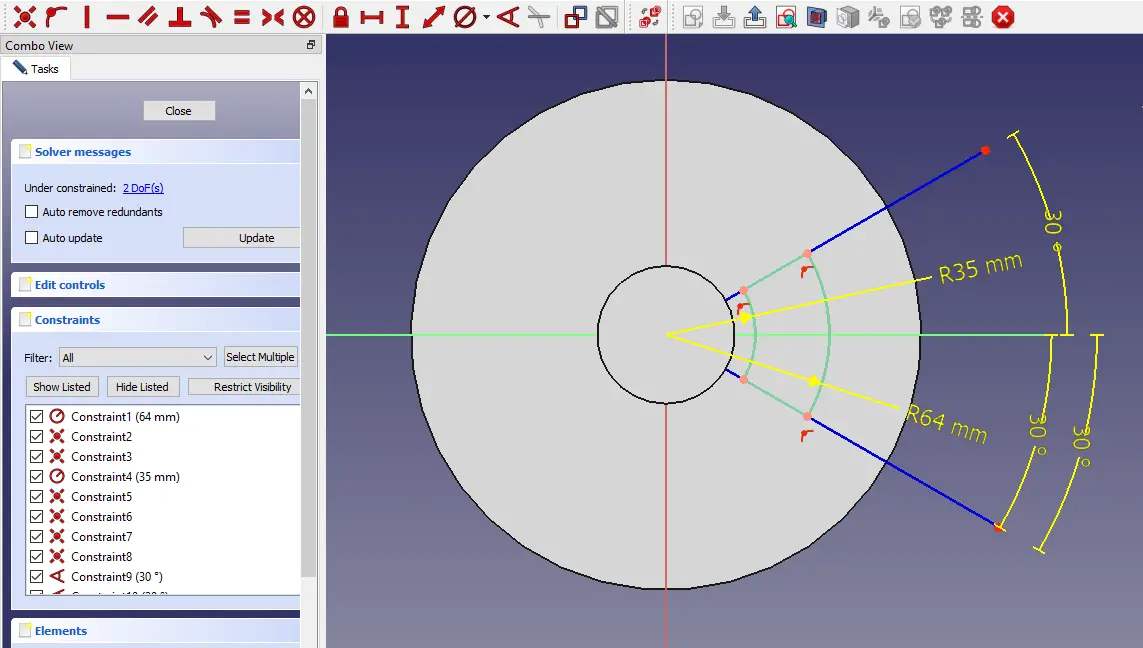
STEP 07-: Now use Polar pattern feature and pattern it.
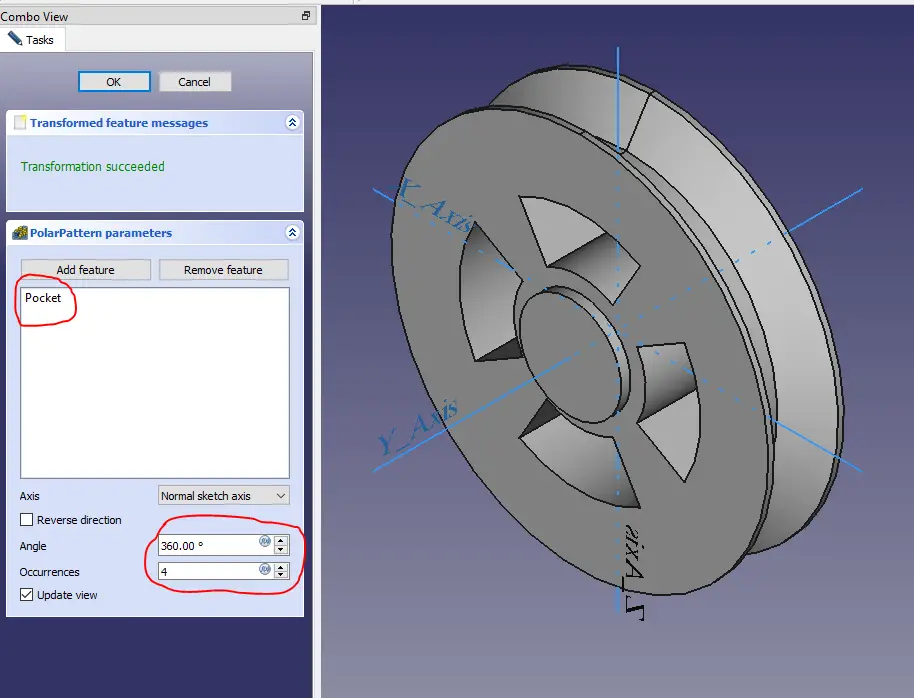
STEP 08-: Select the face and create the sketch.
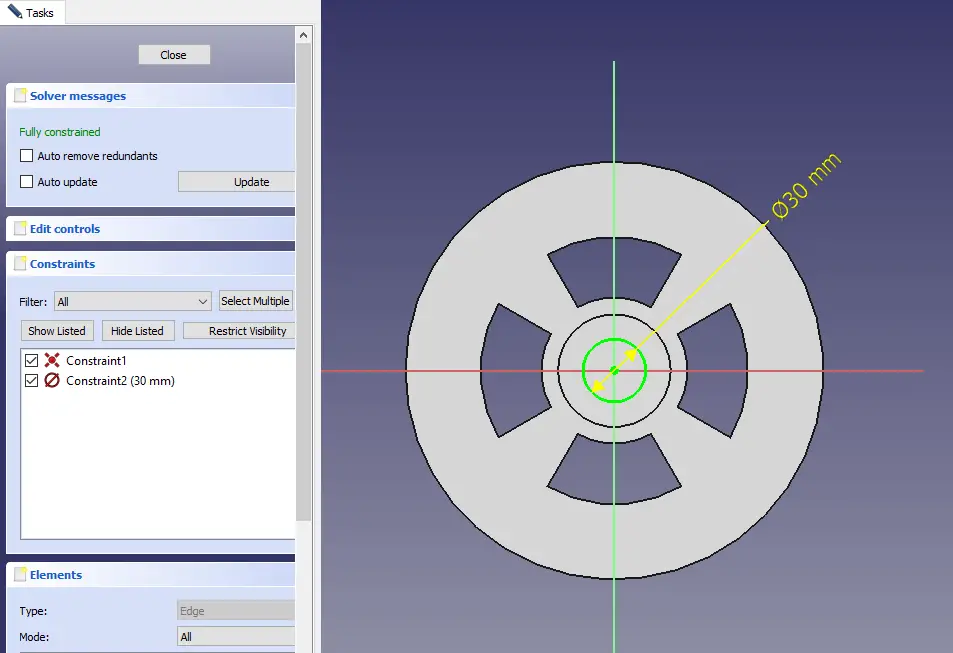
STEP 09-: Add Keyway dimension to the sketch and remove it.
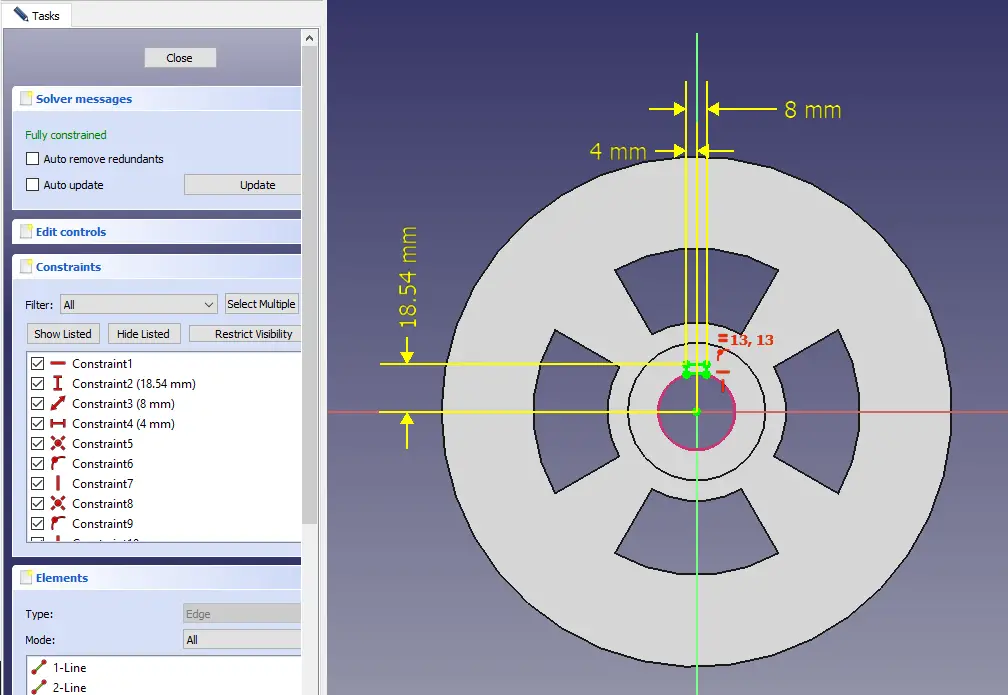
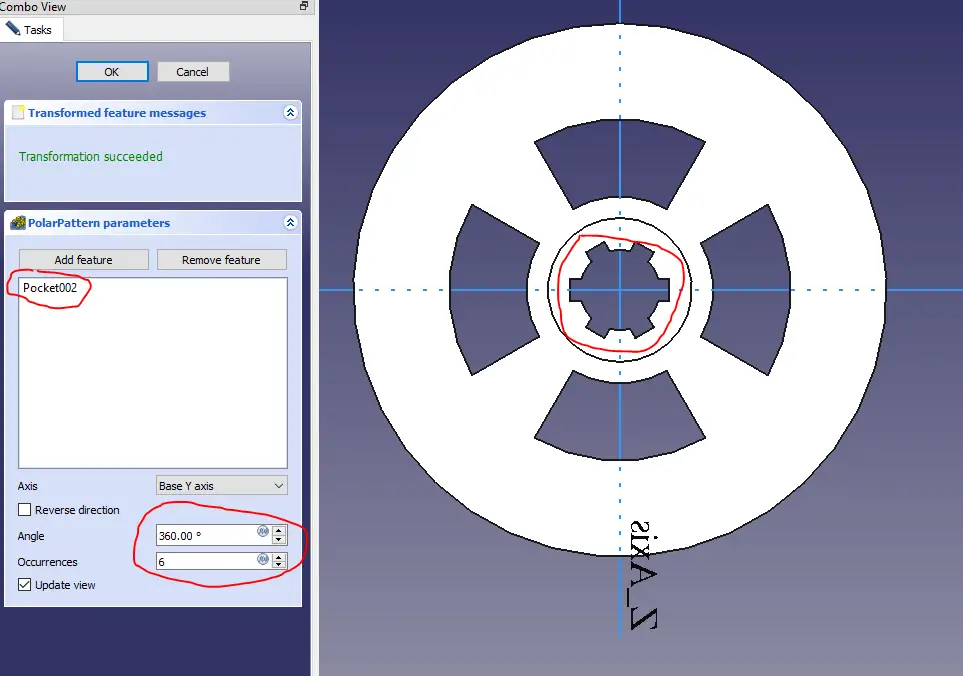
STEP 10-: Use polar pattern and pattern it along Y Axis and keep occurrences 6 as Shown in Below image .
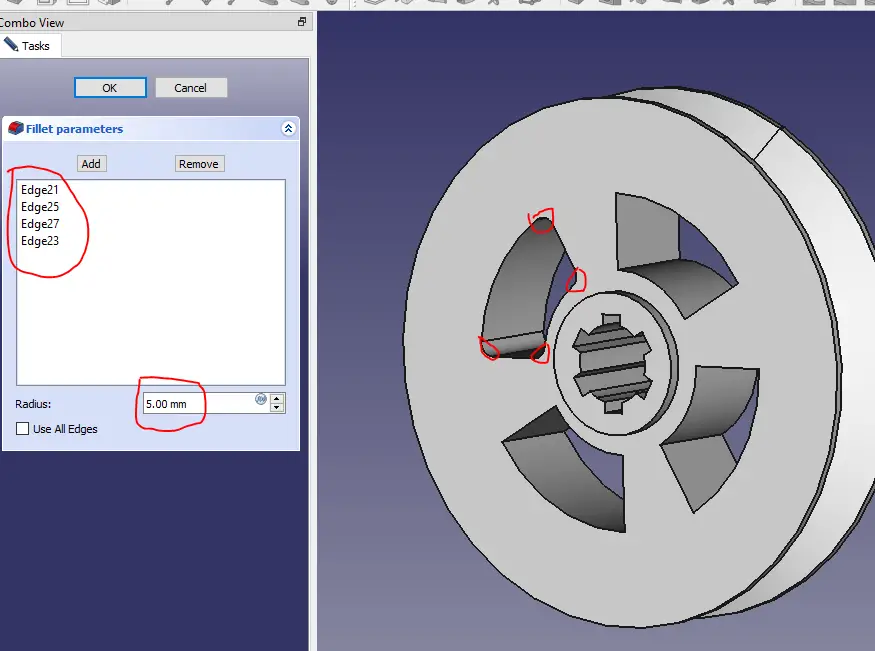
STEP 11-: Fillet the corner as shown in below image.
“Thank you for reading! If you found this article insightful and valuable, consider sharing it with your friends and followers on social media. Your share can help others discover this content too. Let’s spread knowledge together. Your support is greatly appreciated!”


